×
×
WorkSafeBC Compliant · OHS Regulation Part 11
⛵️

Fall Protection
Training Course

A comprehensive, regulation-compliant training program for all Canwide Steel workers who are at risk of falling from elevation.

14
Modules
~4
Hours Training
3m+
Height Threshold
100%
Tie-Off Required
Governing Regulation
BC OHS Regulation Part 11 – Fall Protection
Canwide Steel
Module 1

Introduction

Introduction & Purpose

OHS Regulation 11.2(6)
A worker must use the fall protection system provided by the employer and must be instructed in the use of the system before using it.
Purpose of This Training
To ensure every Canwide Steel worker understands fall hazards, knows how to select, inspect, and use fall protection equipment, and can respond effectively in an emergency.
Why Fall Protection Matters
Falls are the leading cause of serious injury and death in BC construction. Any work at 3 metres (10 feet) or more requires fall protection per OHS Regulation 11.2.

Responsibilities

Employer Must:
Provide a written fall protection plan, supply suitable equipment, train all workers, inspect worksites, and ensure 100% tie-off where required.
Worker Must:
Use provided fall protection, attend all training, report damaged equipment, and never work at height without proper protection.
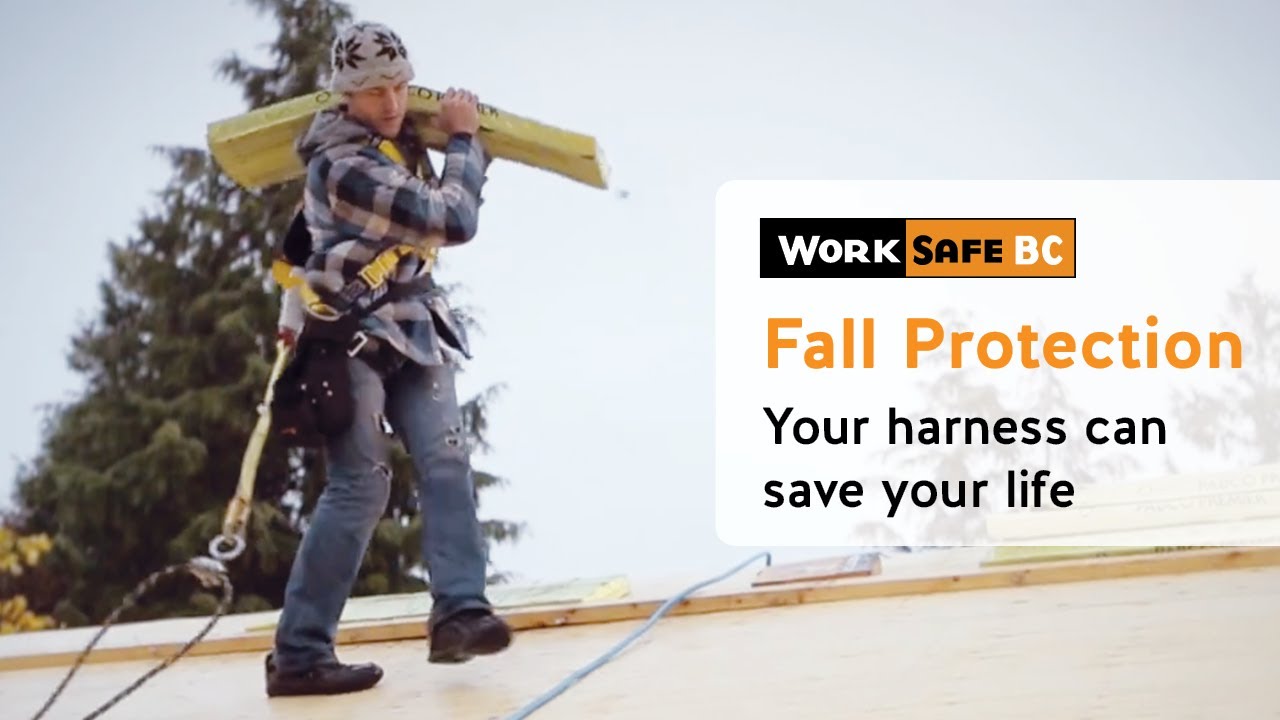
WorkSafeBC Videos – Introduction
Video Thumbnail
Video Thumbnail
Canwide Steel
Module 2

Fall Hazards

Fall Hazard: Roof Edges

Unguarded perimeter edges — extremely high risk. Must use guardrails or full arrest system.
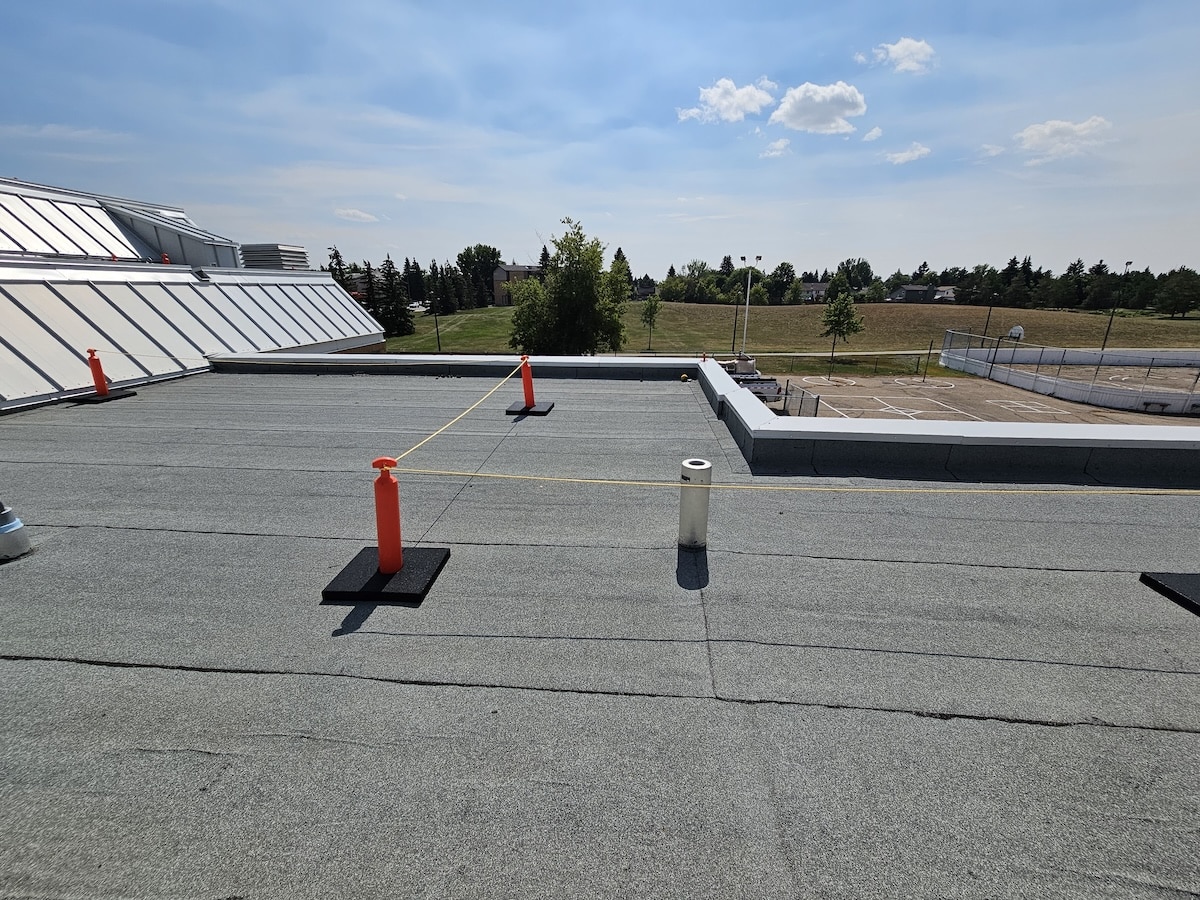
Preview

Fall Hazard: Leading Edges

Advancing edge of structural steel or deck during erection. Requires 100% tie-off.
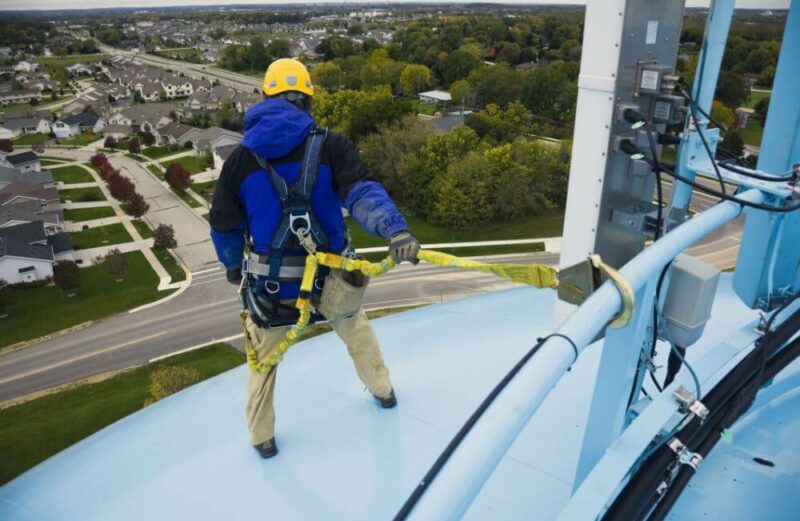
Preview

Fall Hazard: Floor Openings

Holes in decks, floors, or platforms. Must be covered, guarded, or worker tied off.
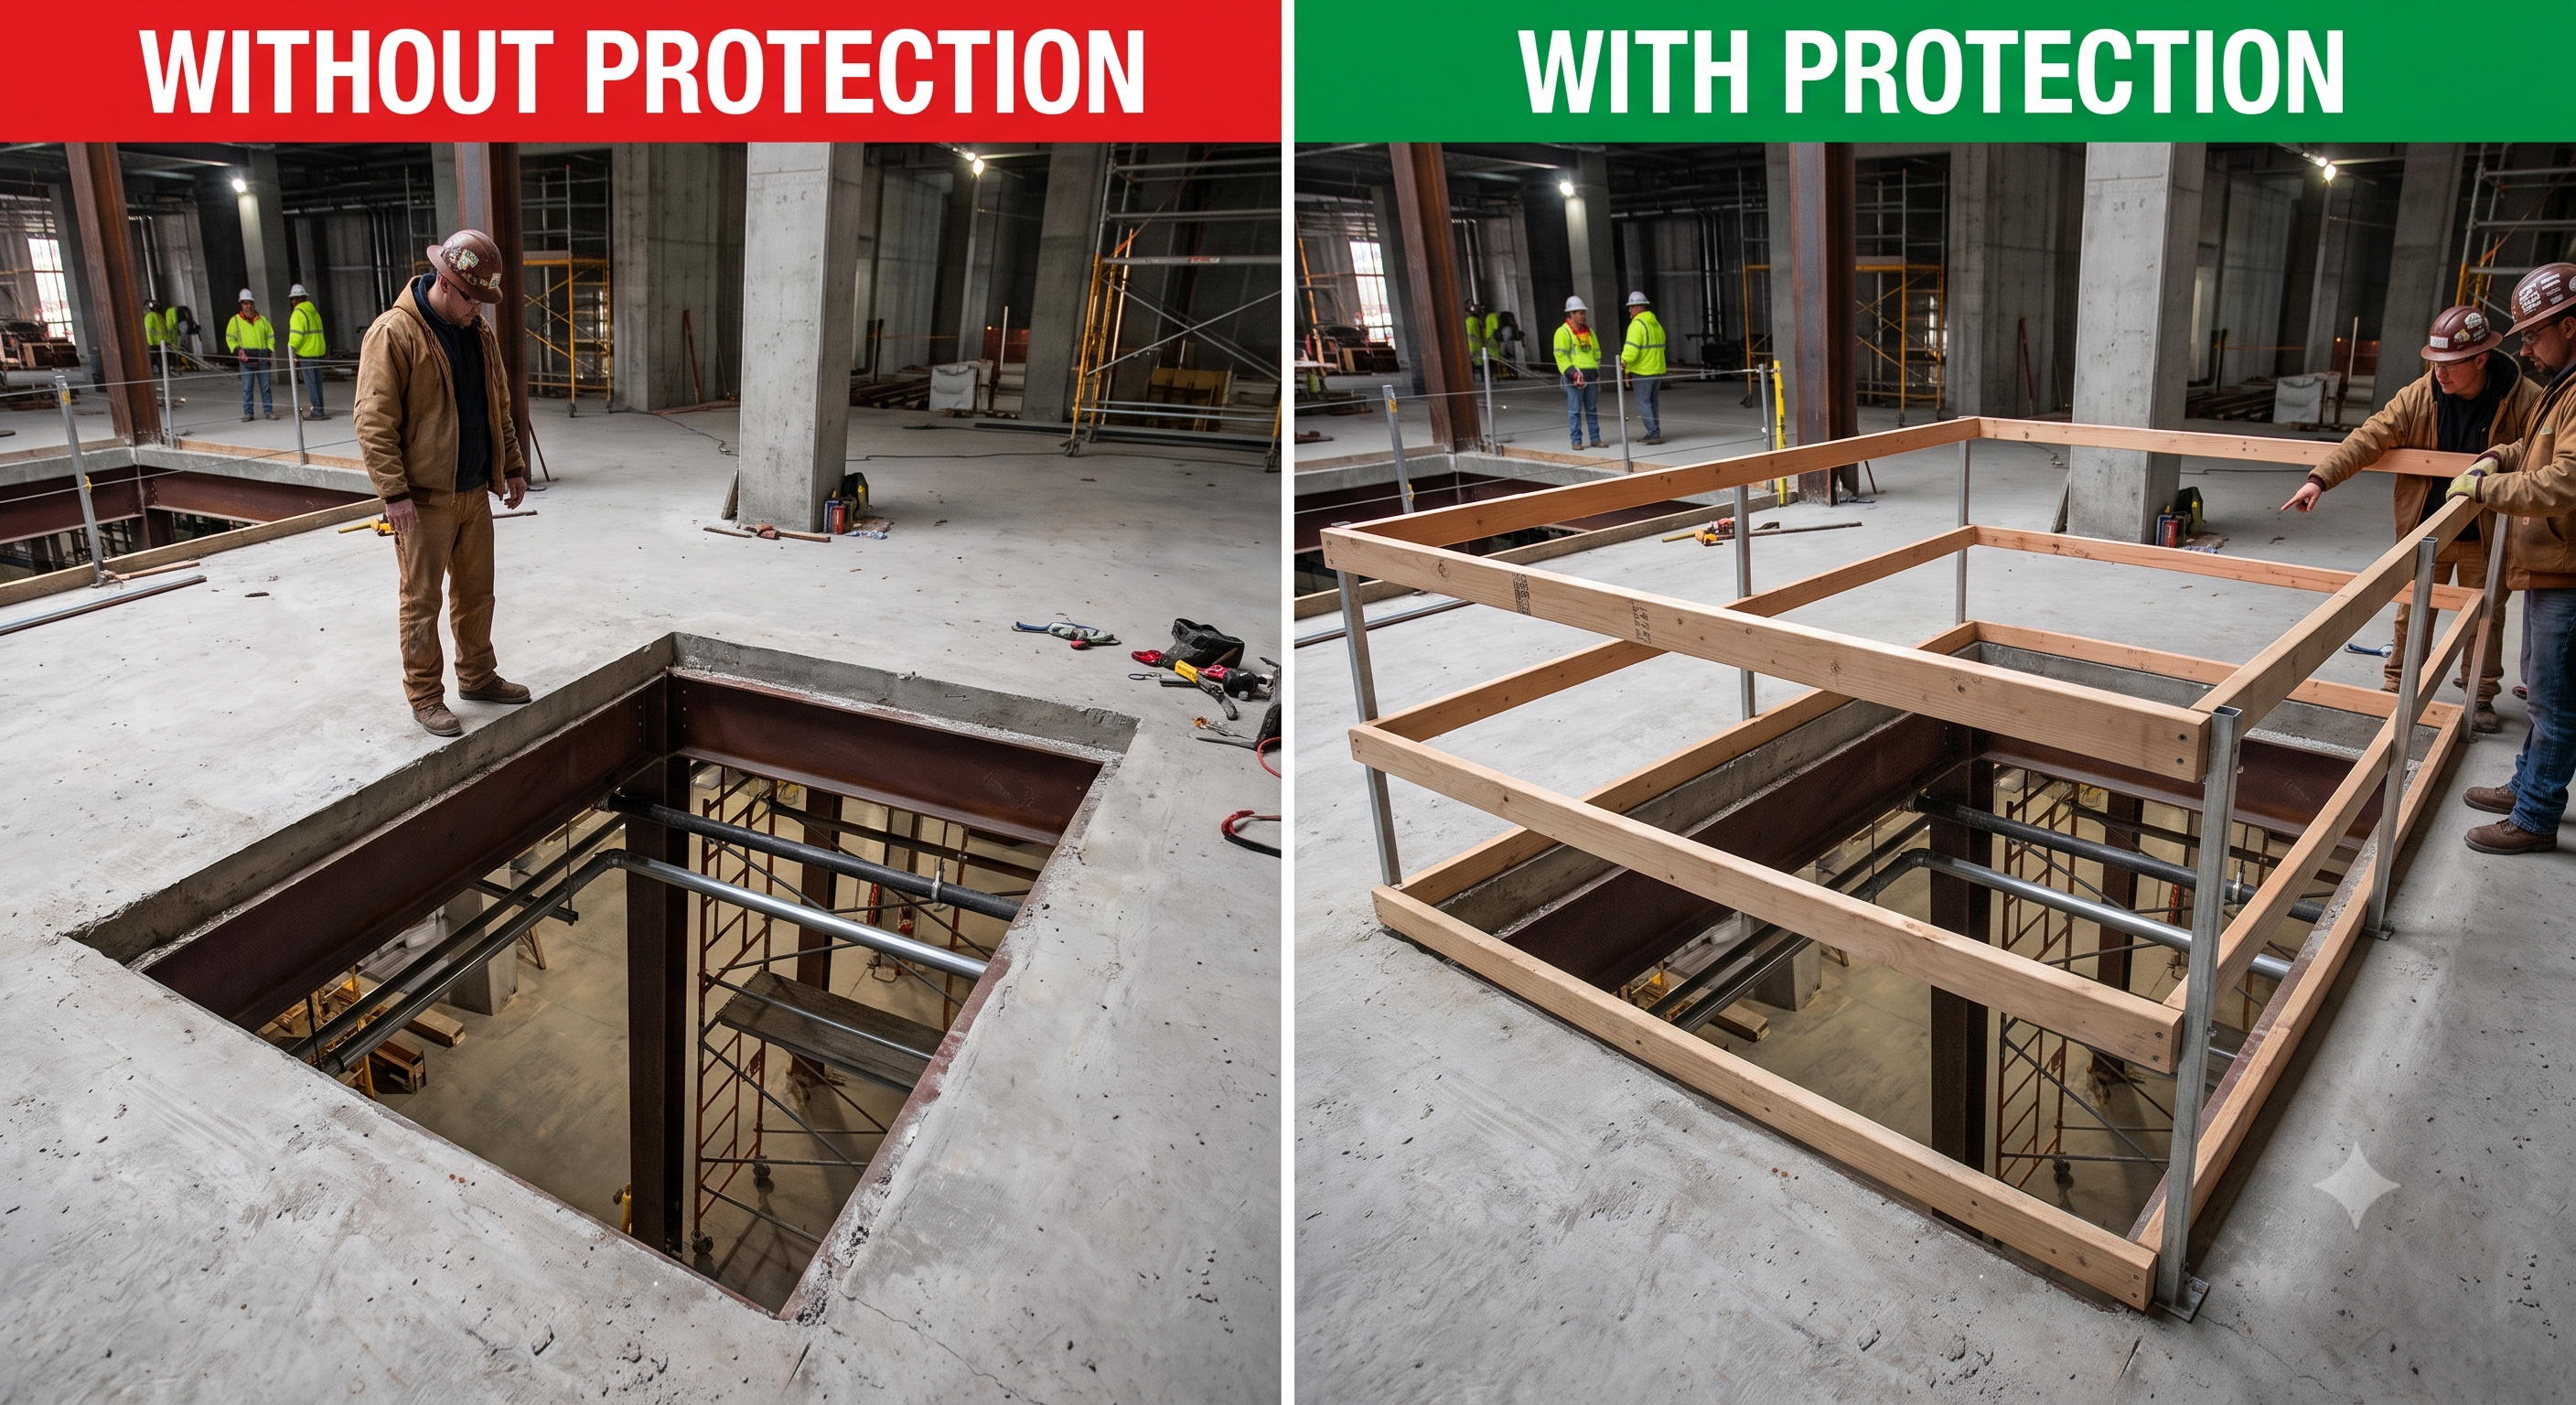
Preview

Fall Hazard: Scaffolds

Platforms above 3m must have guardrails. Workers need scaffold-specific training.
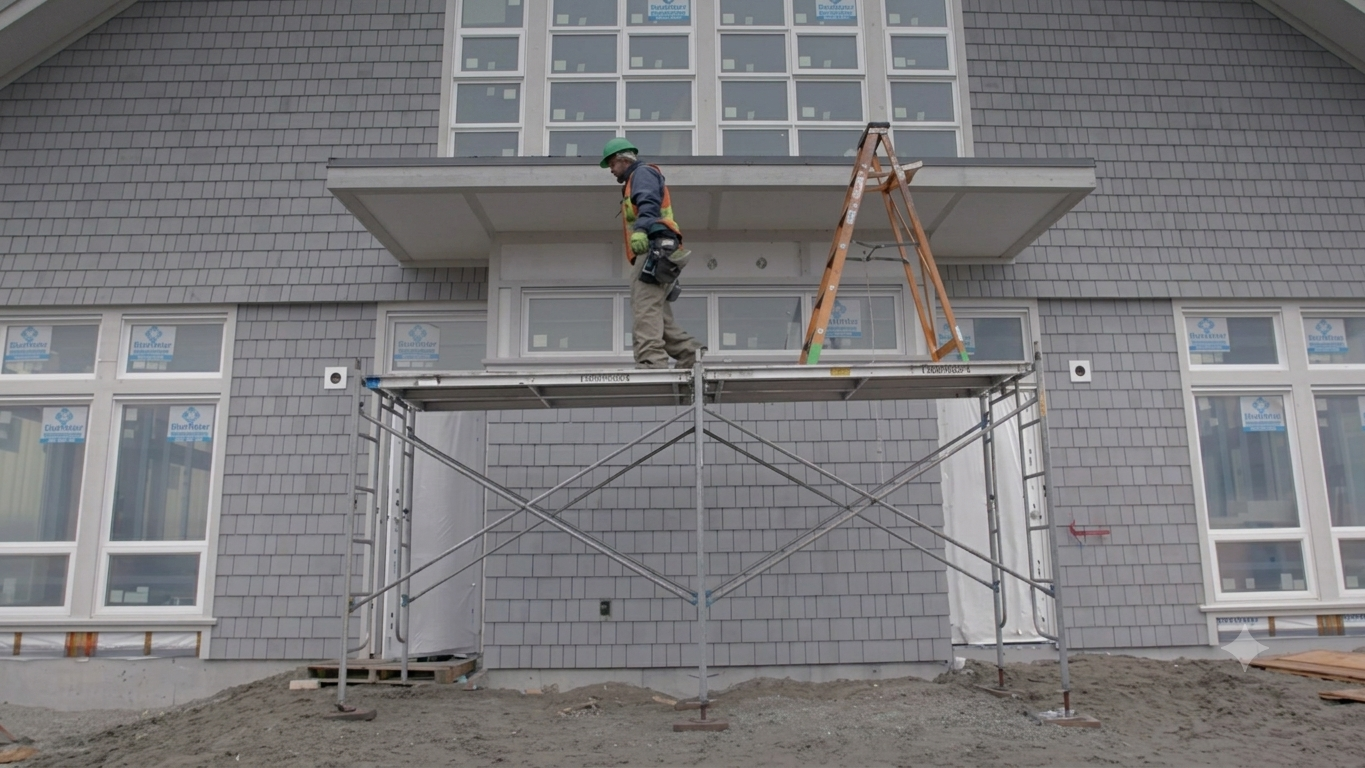
Preview

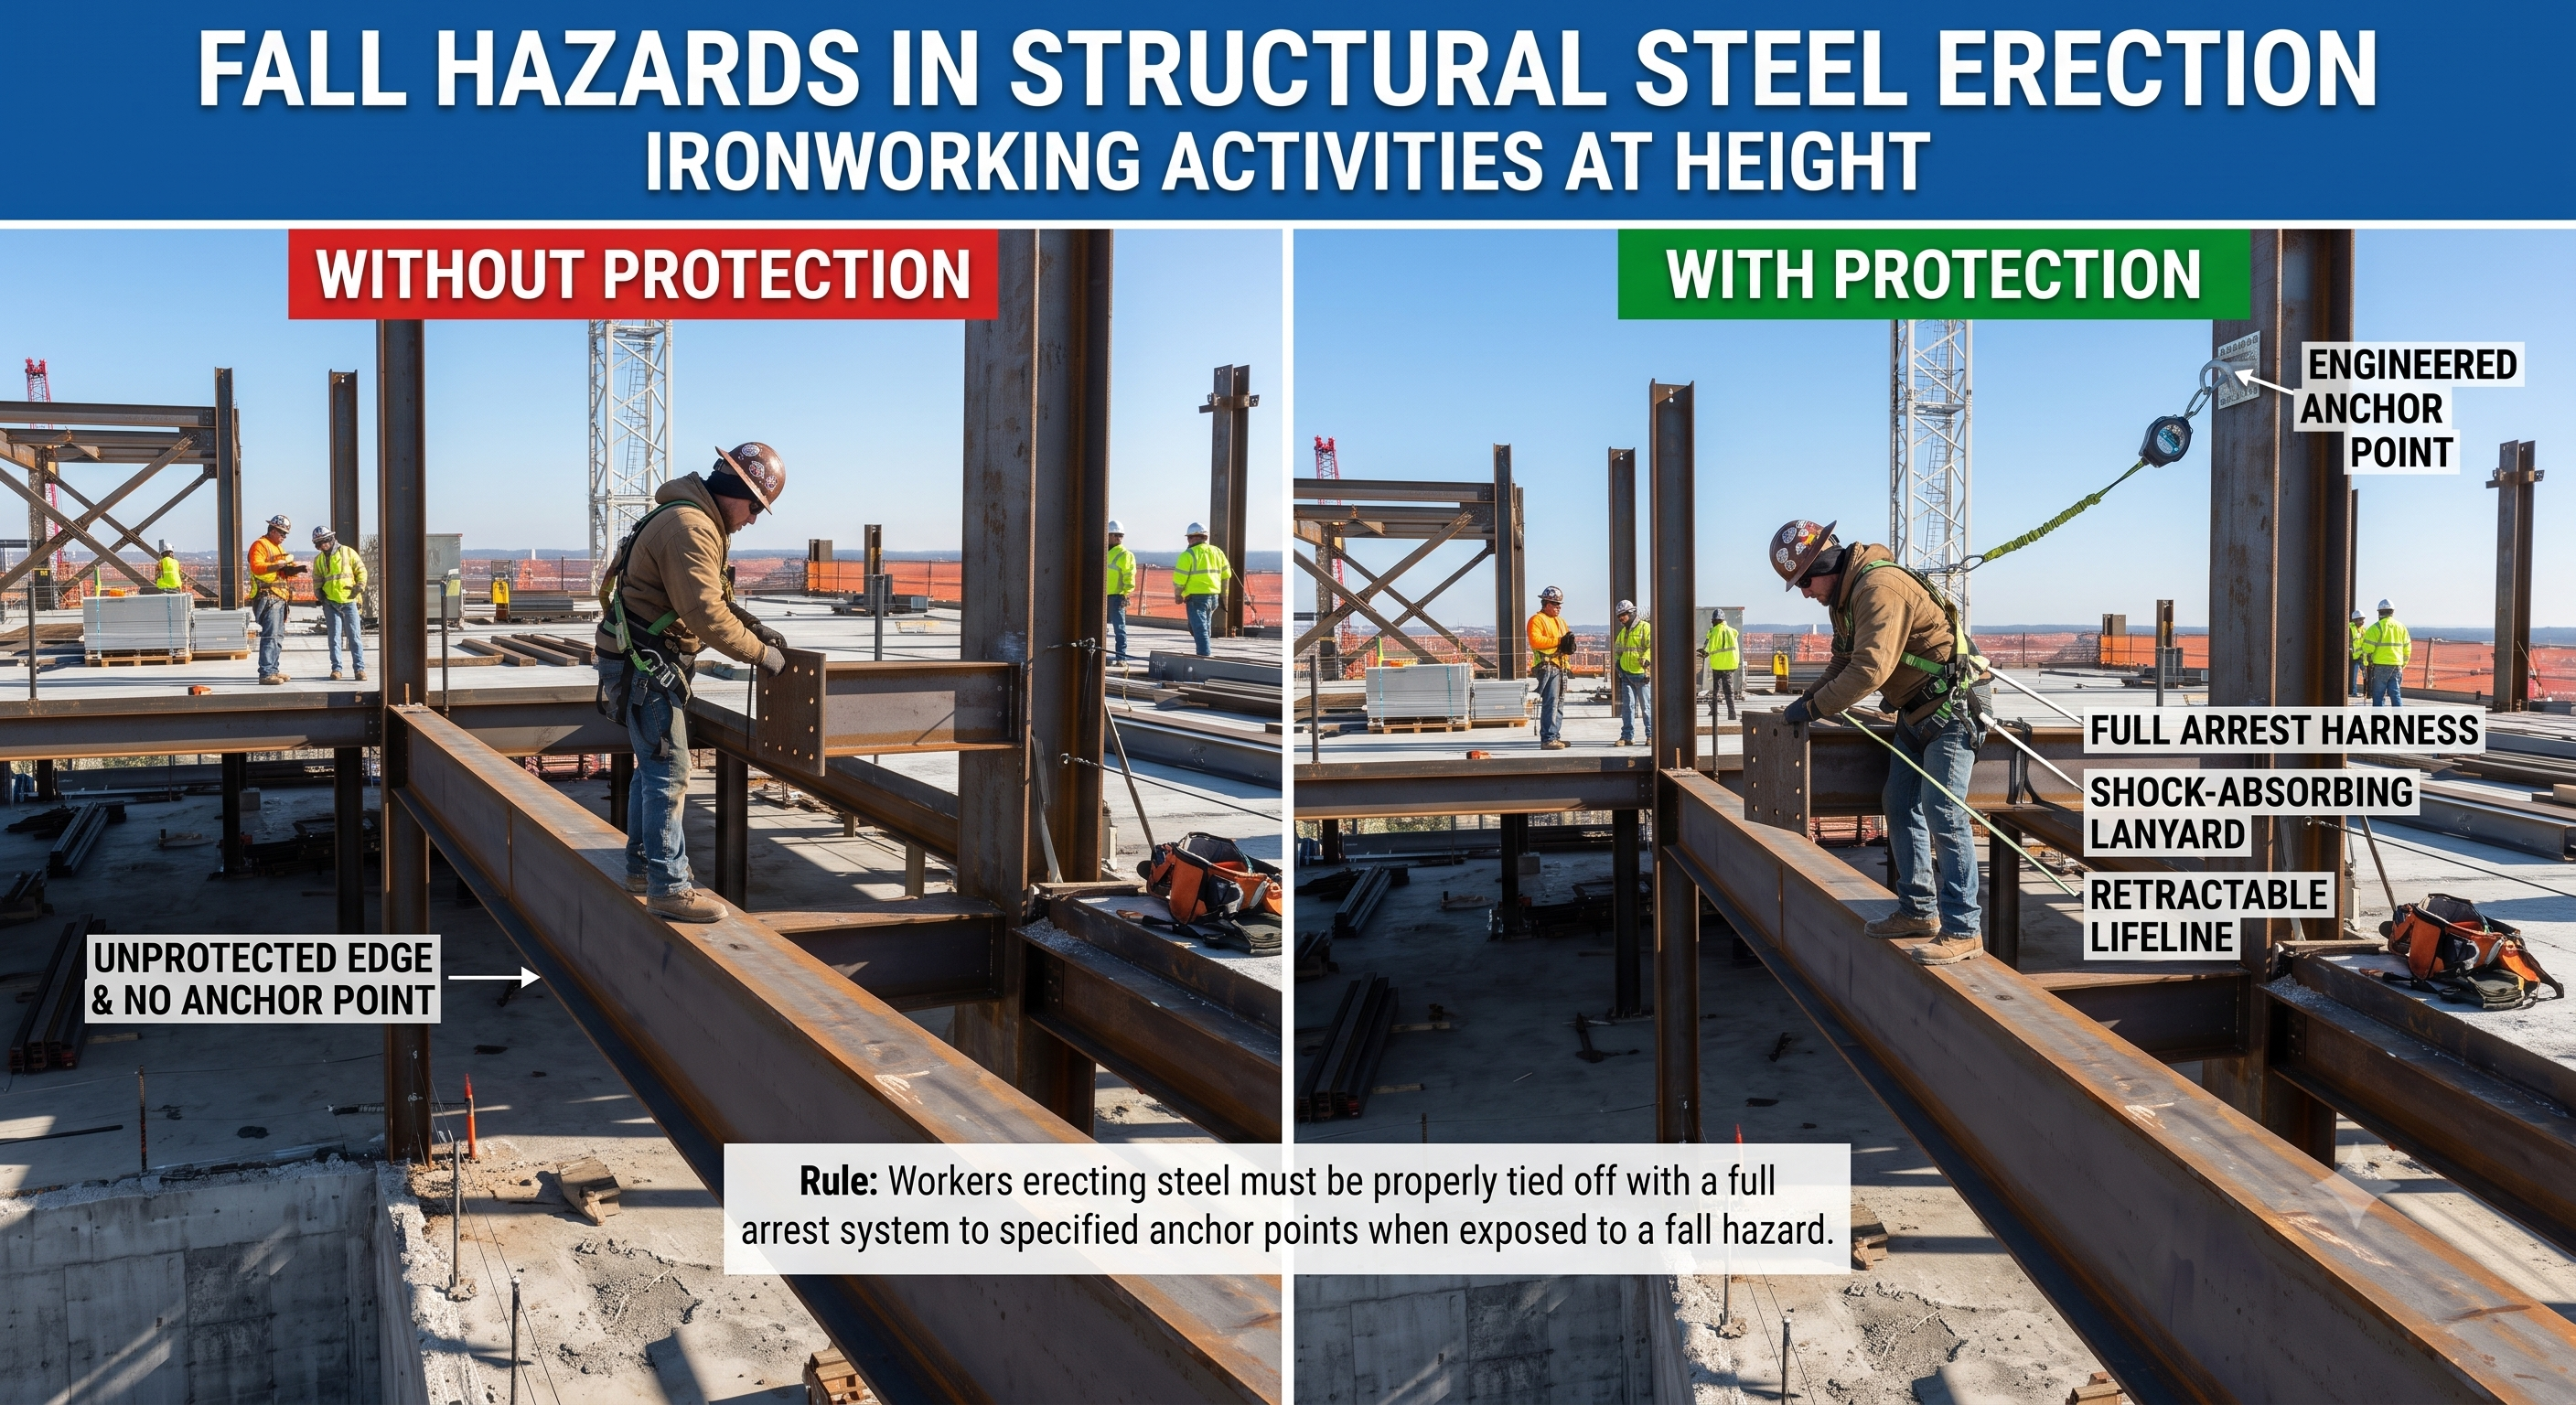
Fall Hazard: Structural Steel

Ironworking/erection activities at height. Full arrest system and anchor points required.
Preview

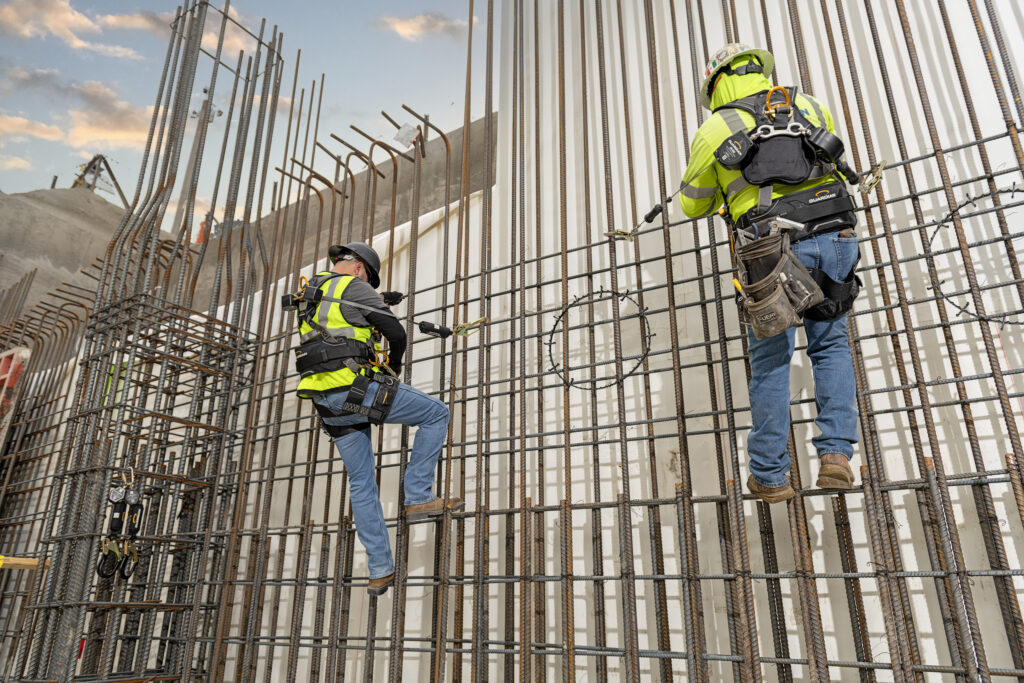
Fall Hazard: Rebar Work

Protruding rebar creates impalement risk. Fall protection AND rebar caps required.
Preview

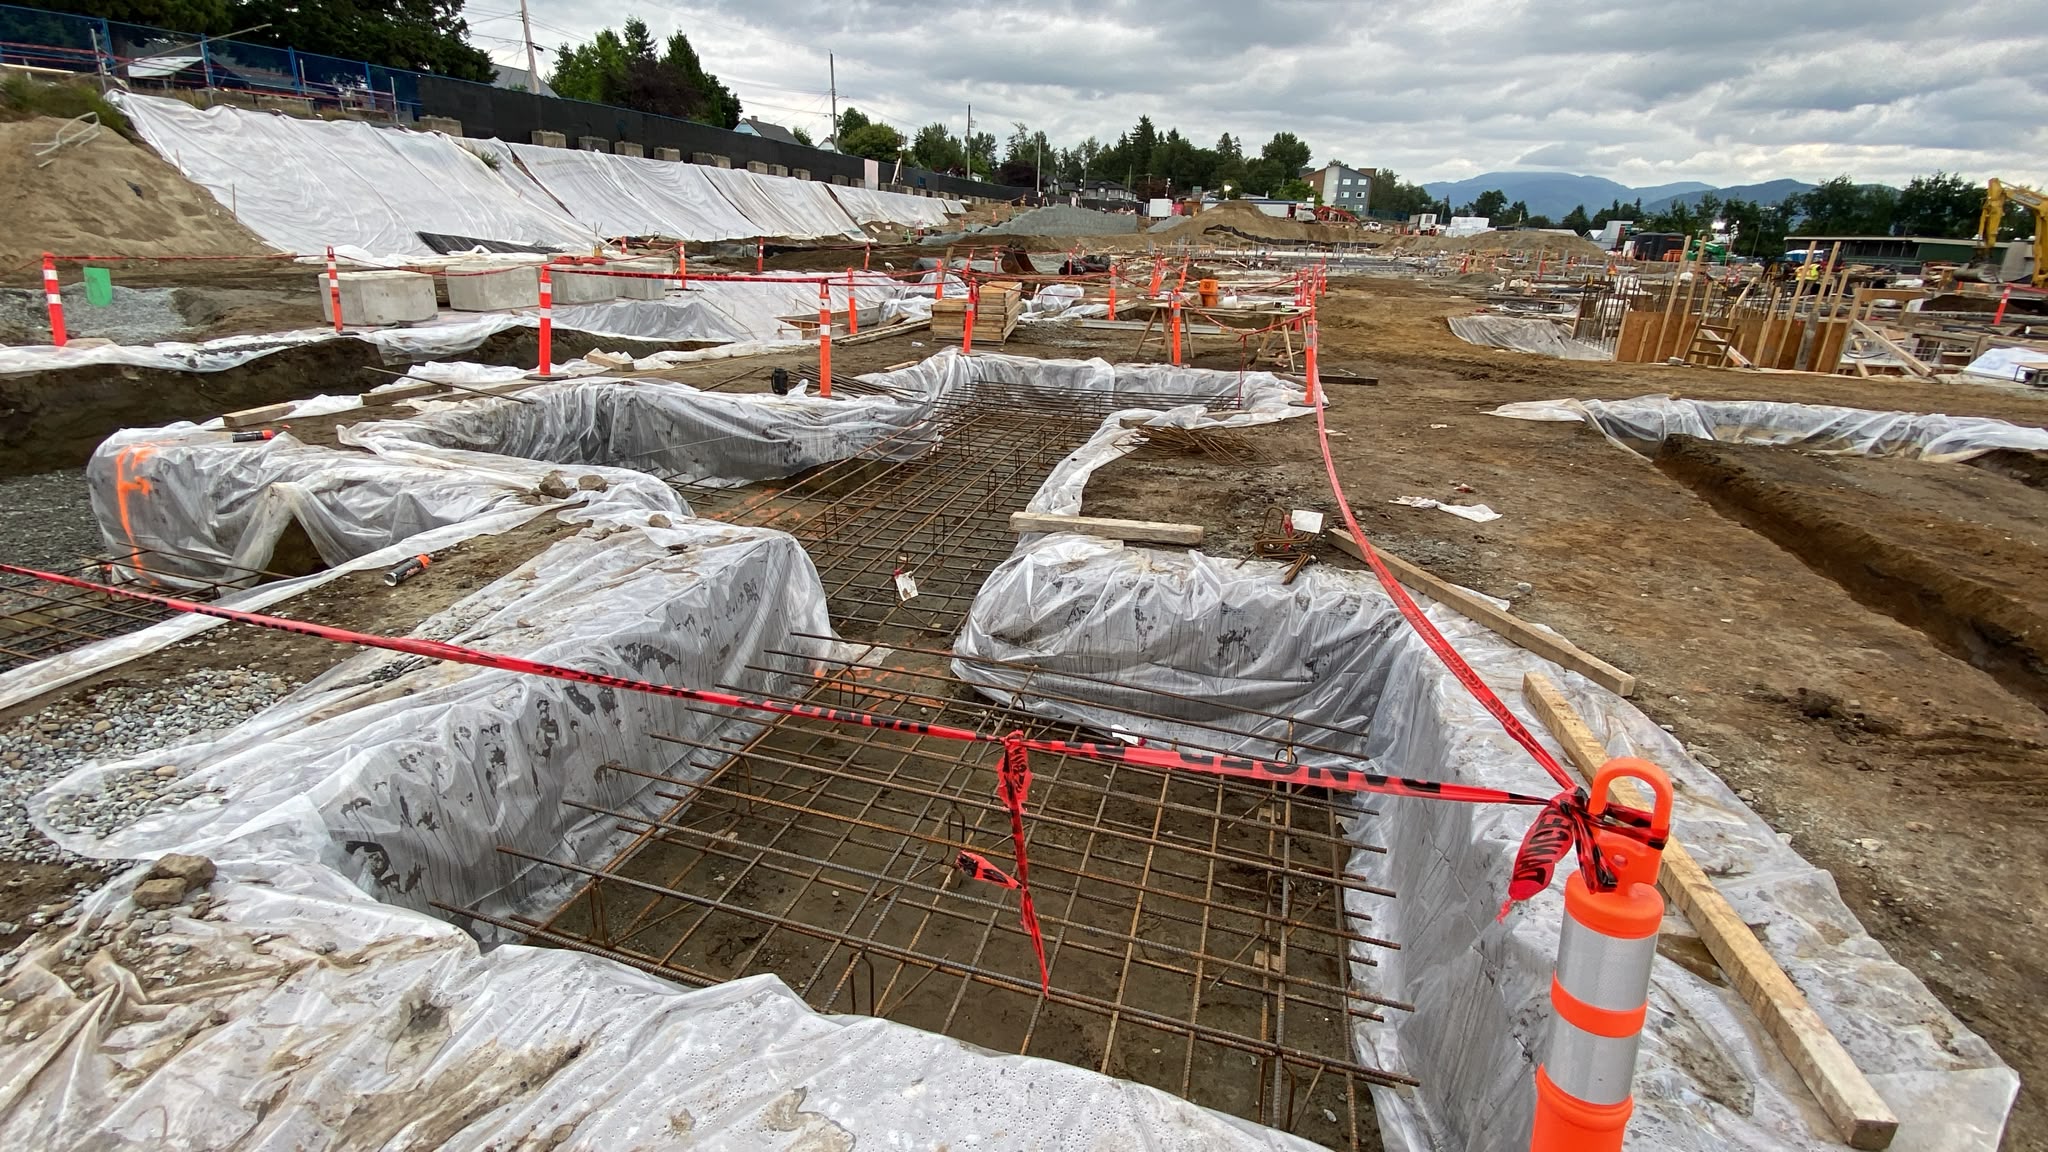
Fall Hazard: Excavations

Edges of trenches and excavations. Barriers required to prevent falls into excavations.
Preview
Canwide Steel
Module 4

Fall Protection Hierarchy

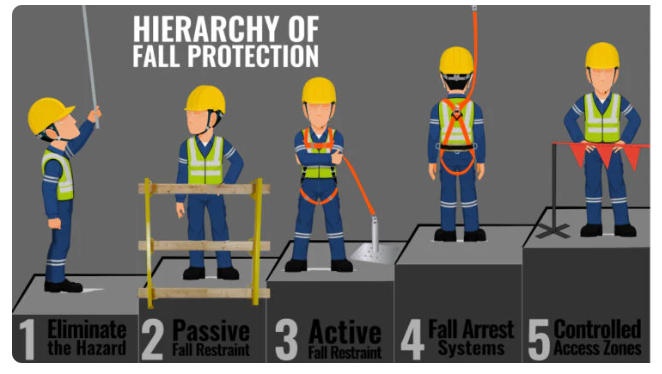
Fall Protection Hierarchy

The fall protection hierarchy must be used when choosing methods to eliminate or control fall hazards. The steps are listed in the order in which they should be considered.
Preview

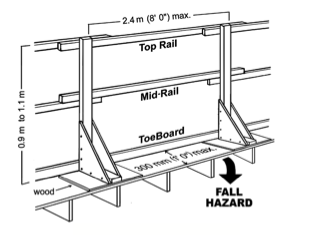
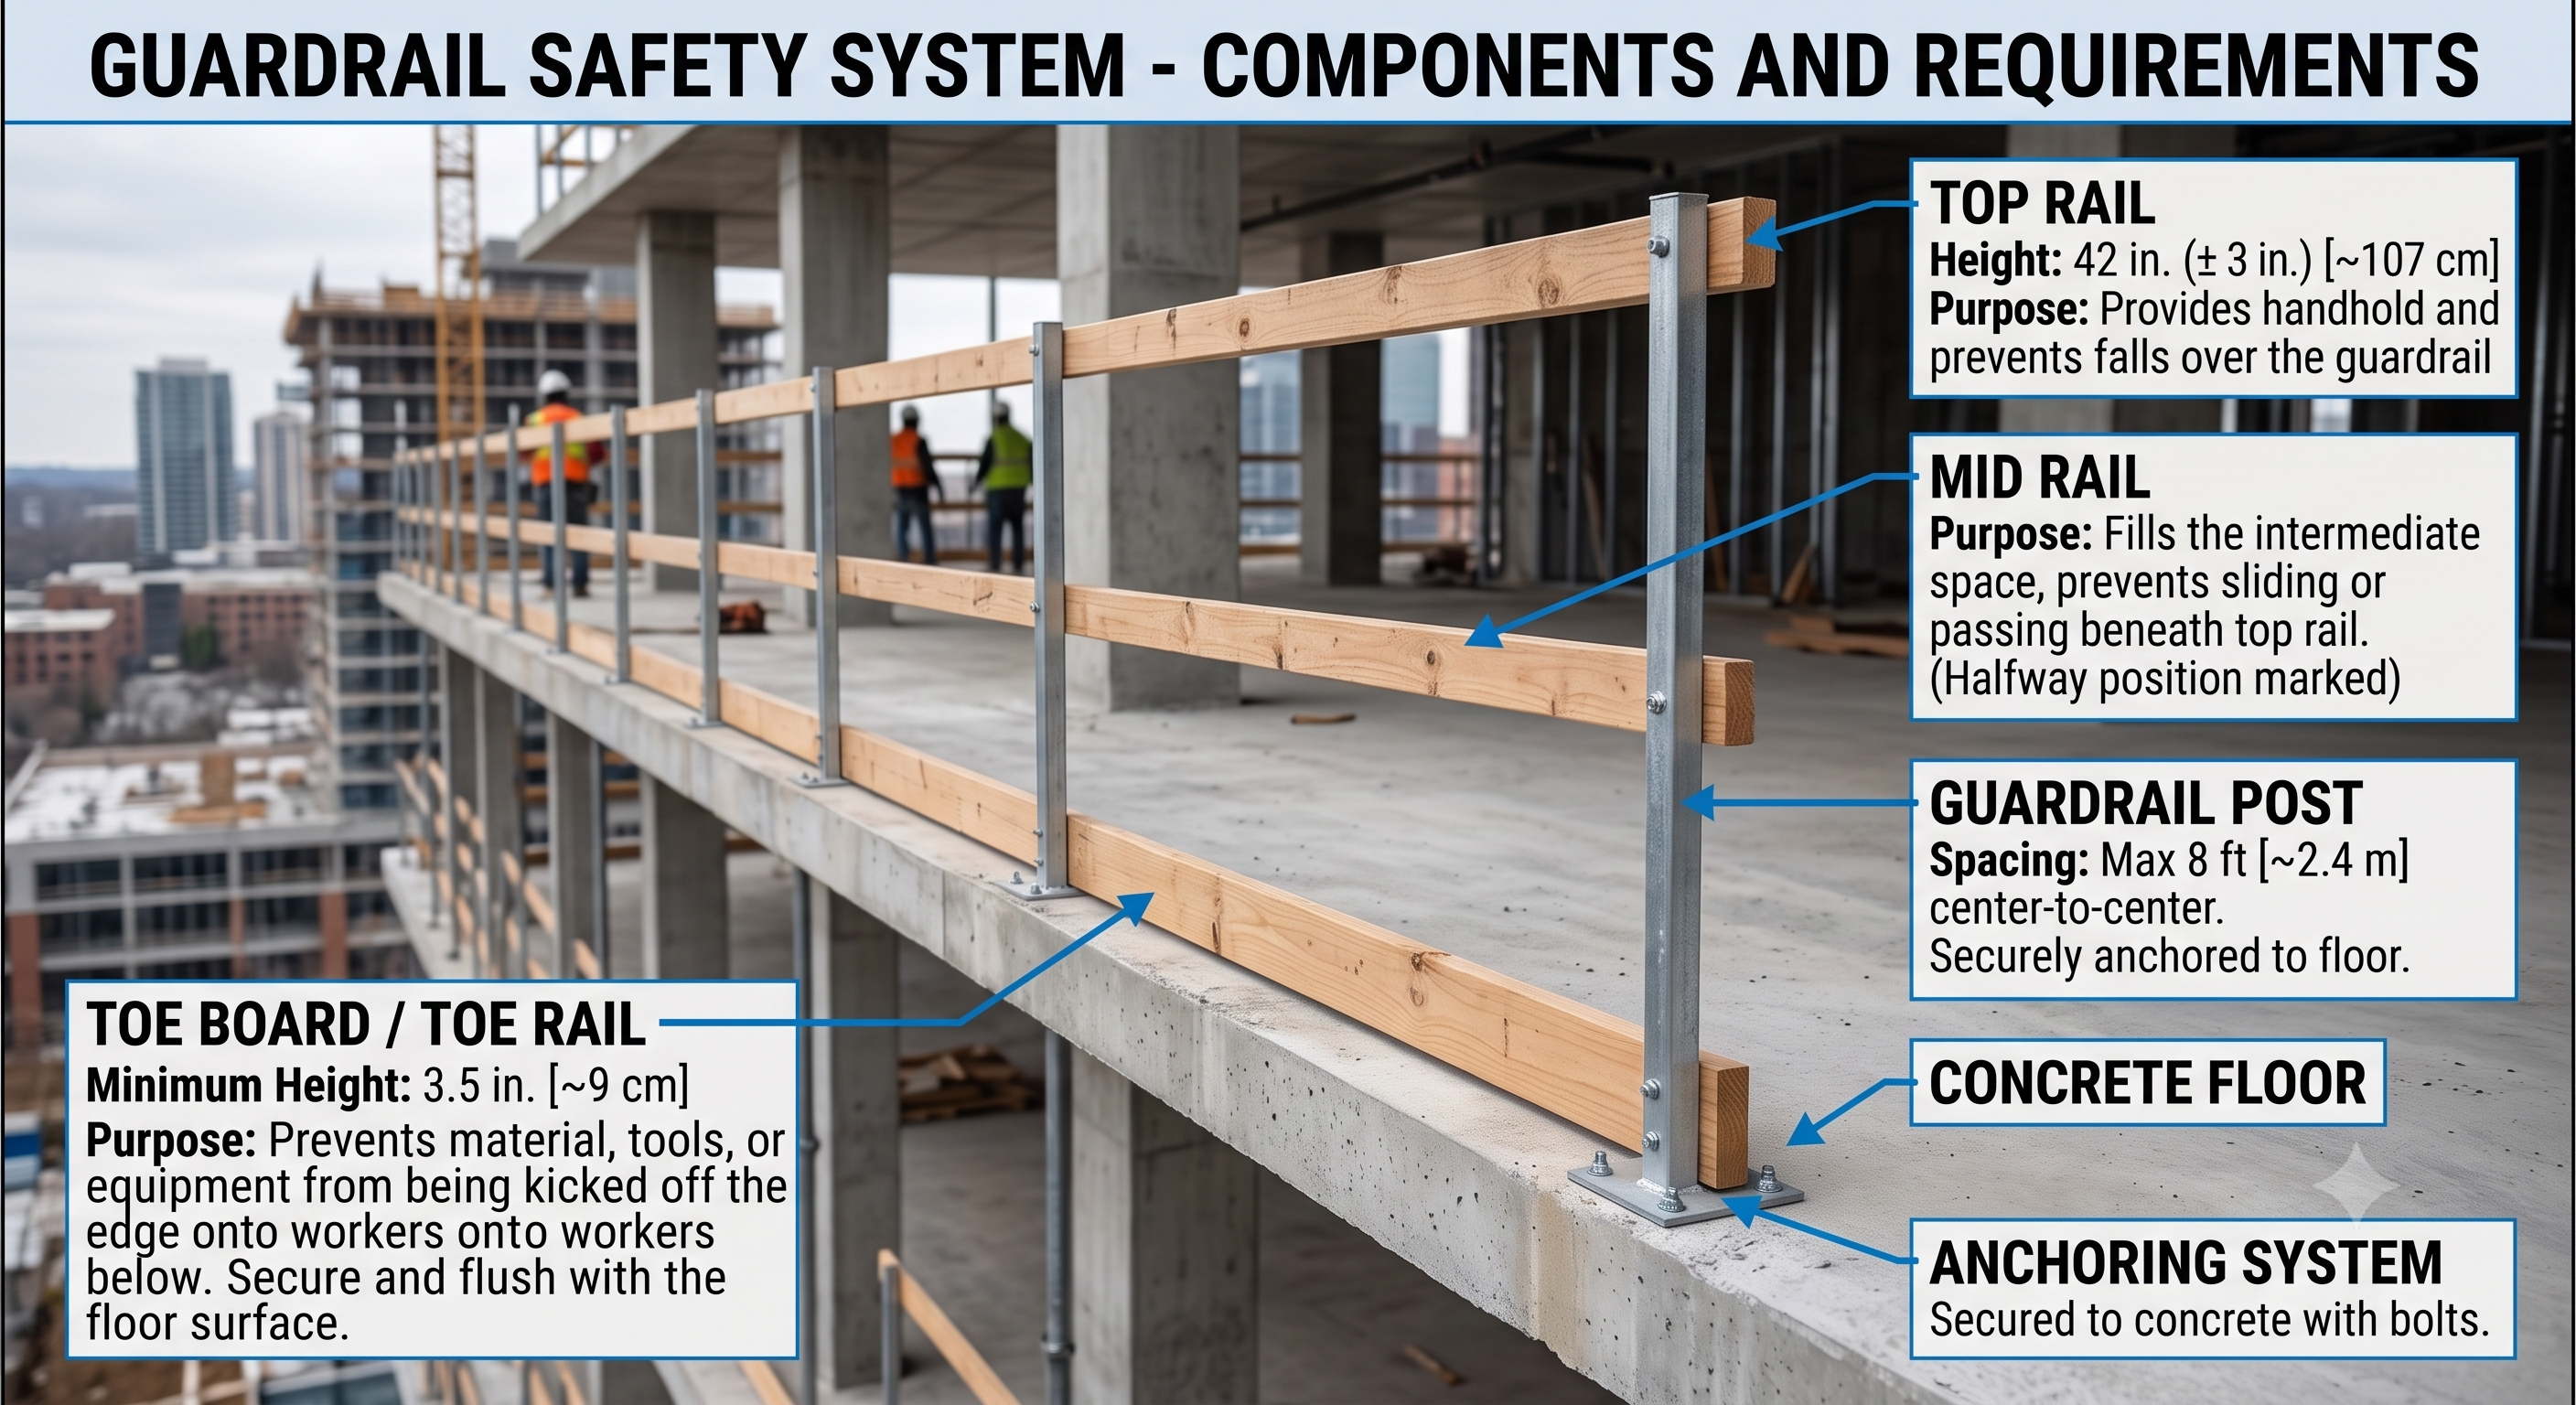
1. Guardrails

Where fall hazards cannot be eliminated, permanent or temporary guardrails or handrails form a protective barrier around an opening or edge to prevent a fall to a lower level.
Preview
Preview

2. Fall Restraint

After eliminating fall hazards and installing guardrails, a fall restraint system is the next level in the fall protection hierarchy.

Fall restraint systems prevent you from falling through either travel restriction or work positioning. With travel restriction, workers are attached to a fixed-length line that prevents them from travelling too close to an opening or edge.

Video Thumbnail

3. Fall Arrest

When it's not possible or practical to use a fall restraint system, the next line of protection is fall arrest.

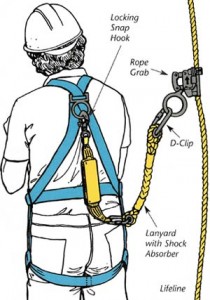
A fall arrest system (including a lanyard or lifeline, a harness, and, most importantly, an anchor) protects you after a fall by stopping you from hitting the surface below.

Video Thumbnail

4. Work Procedures

If guardrails, fall restraint, or fall arrest are not practicable, or will result in greater risk of injury, contact the Prevention Information Line to discuss alternative safe work procedures that are acceptable to WorkSafeBC.

Video Thumbnail

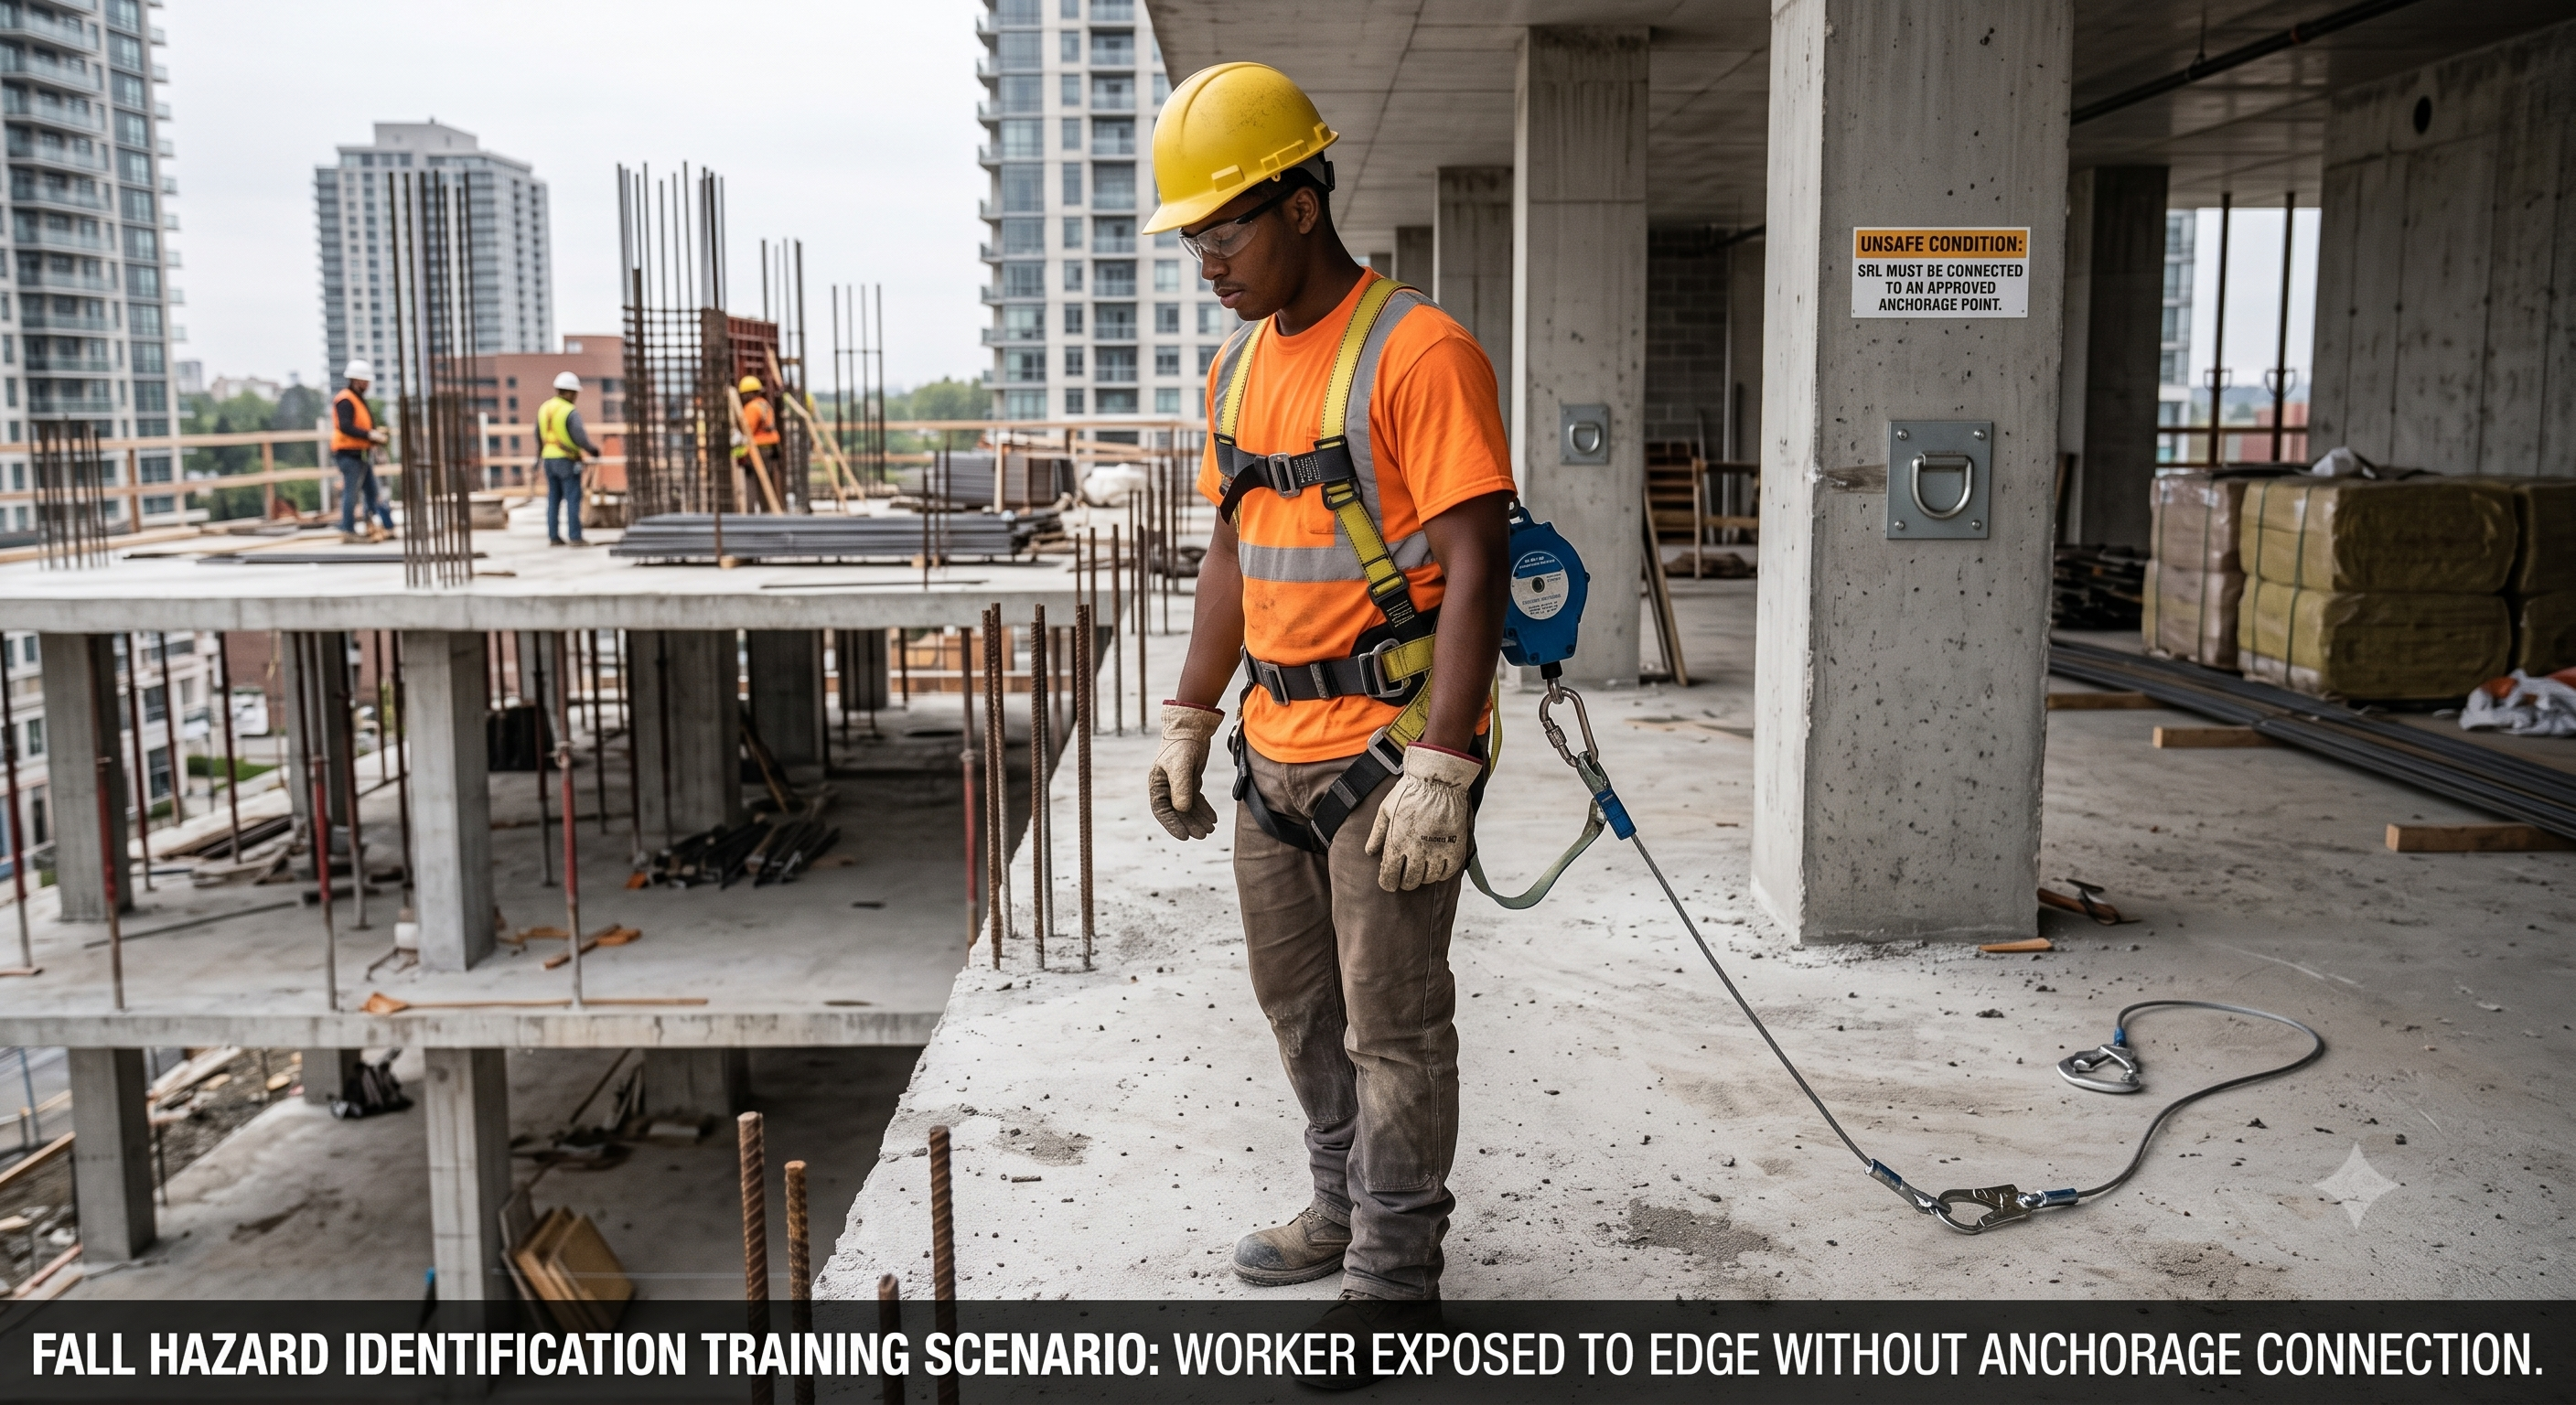
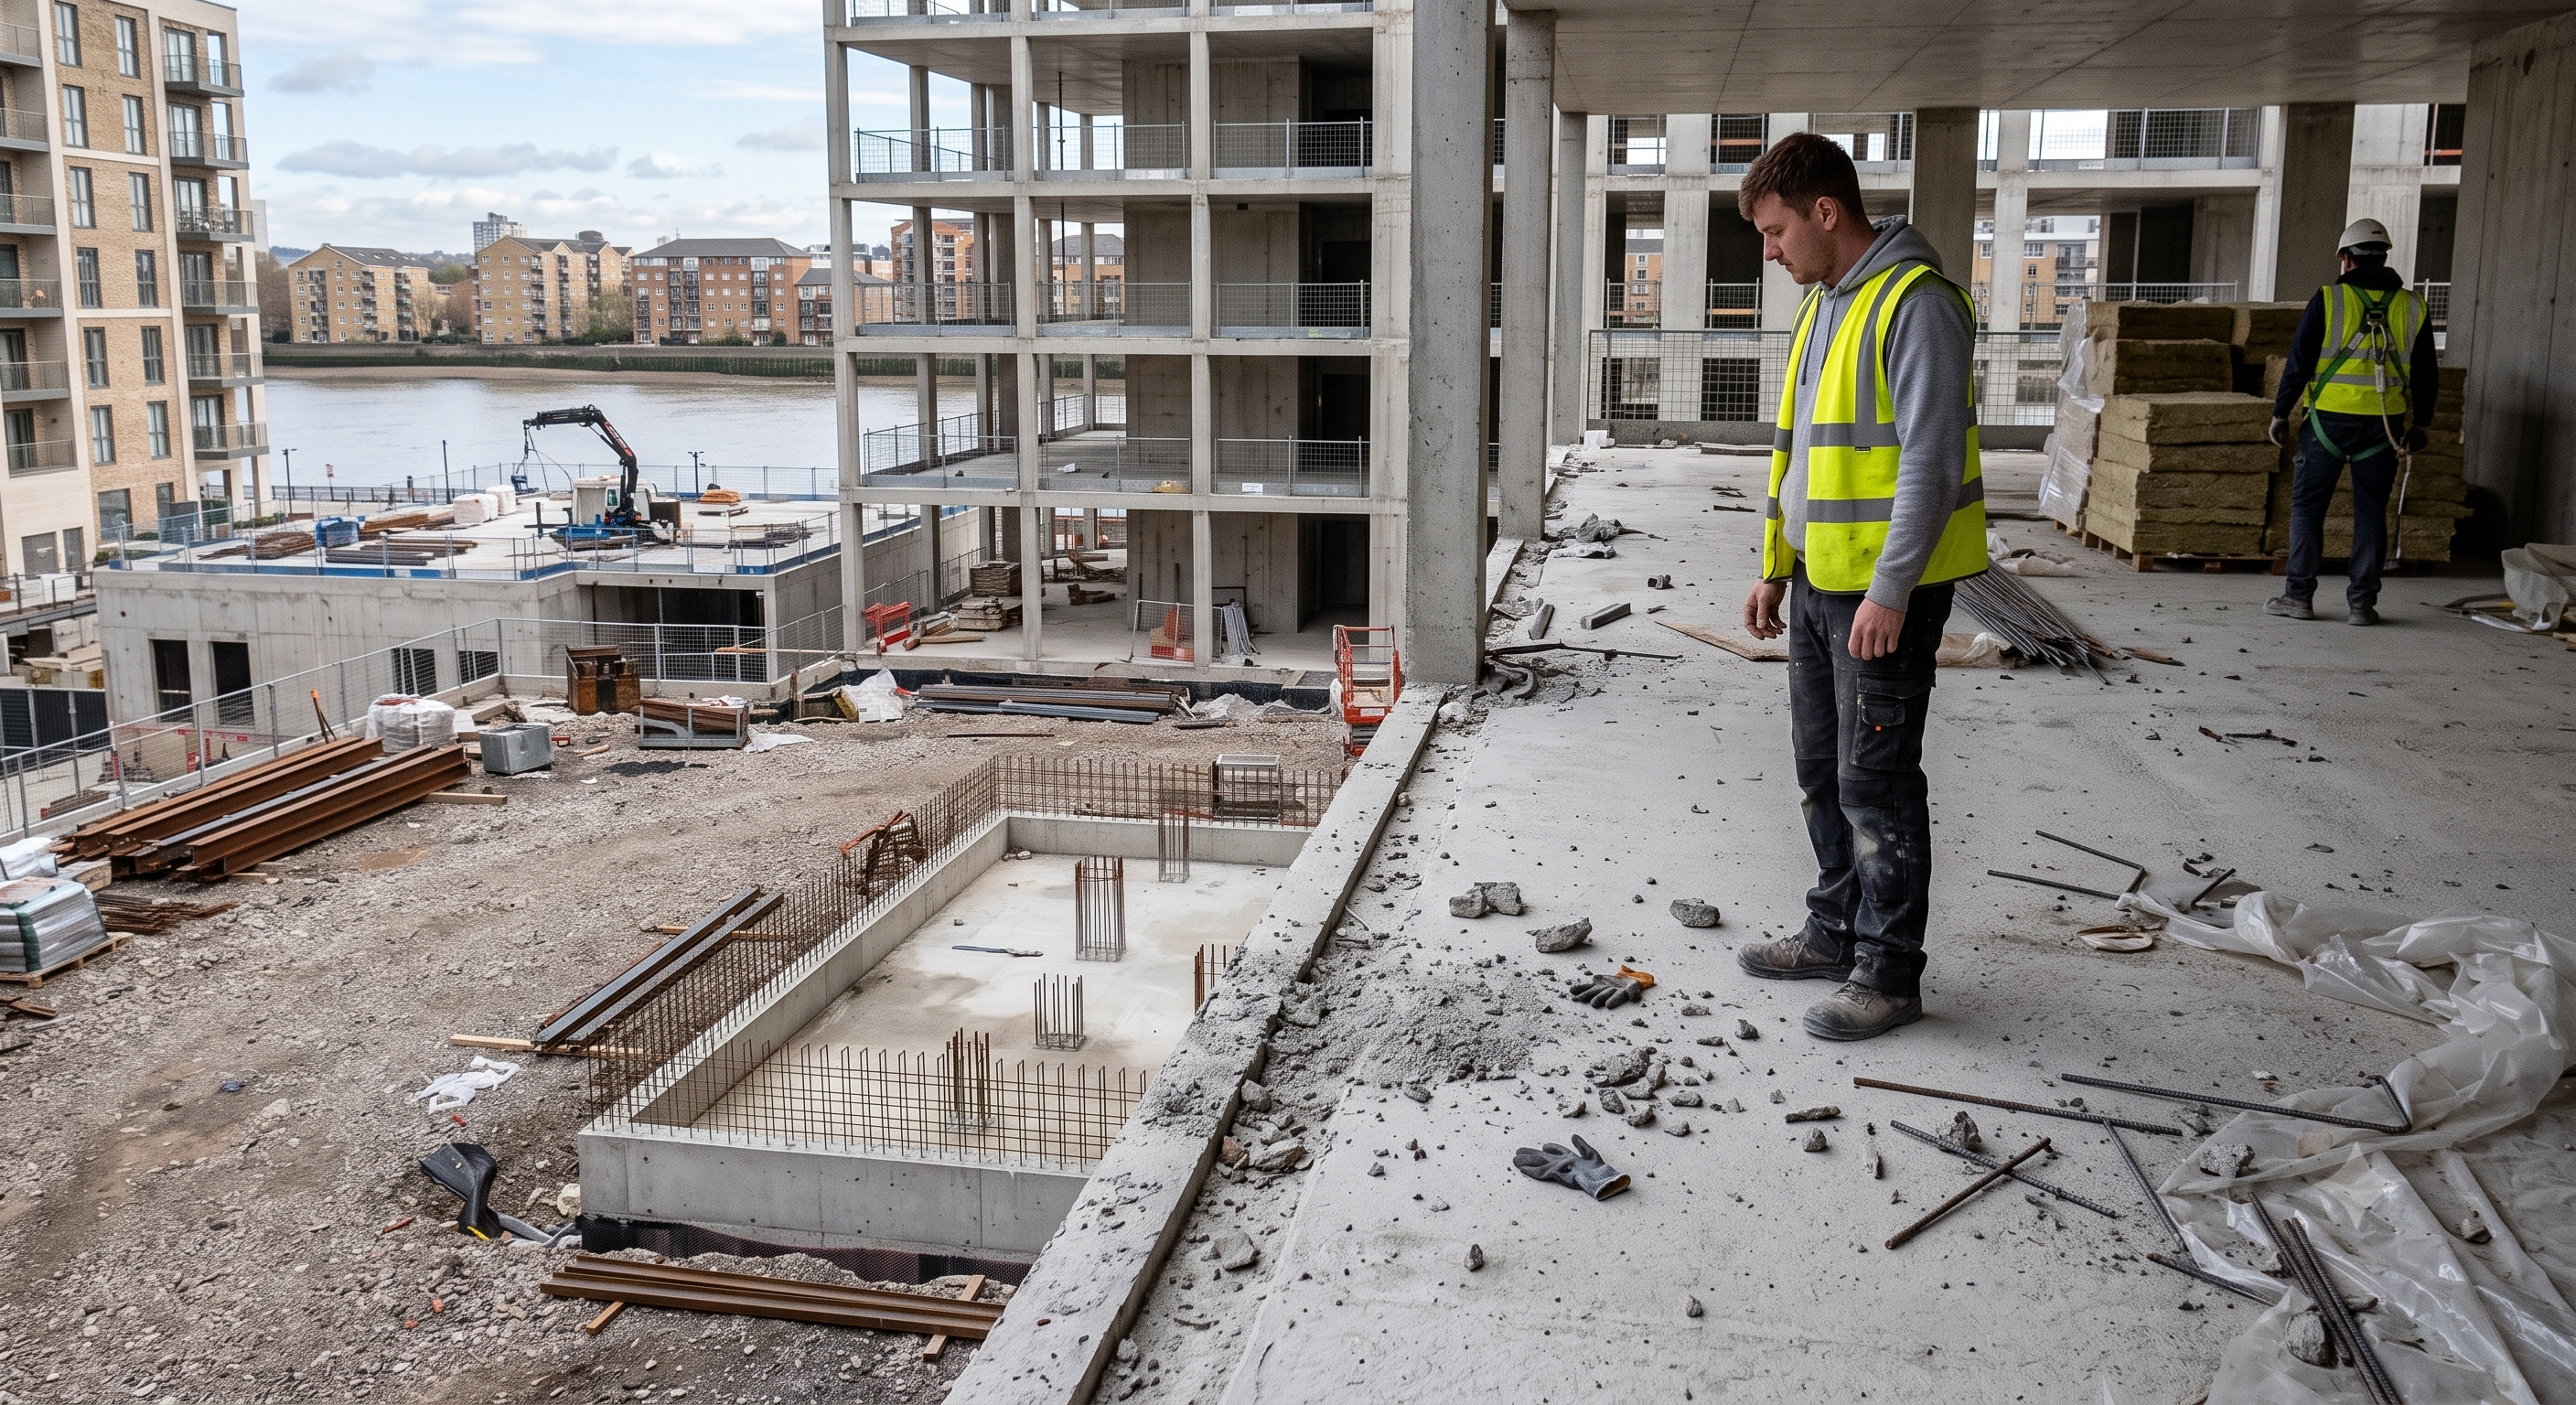
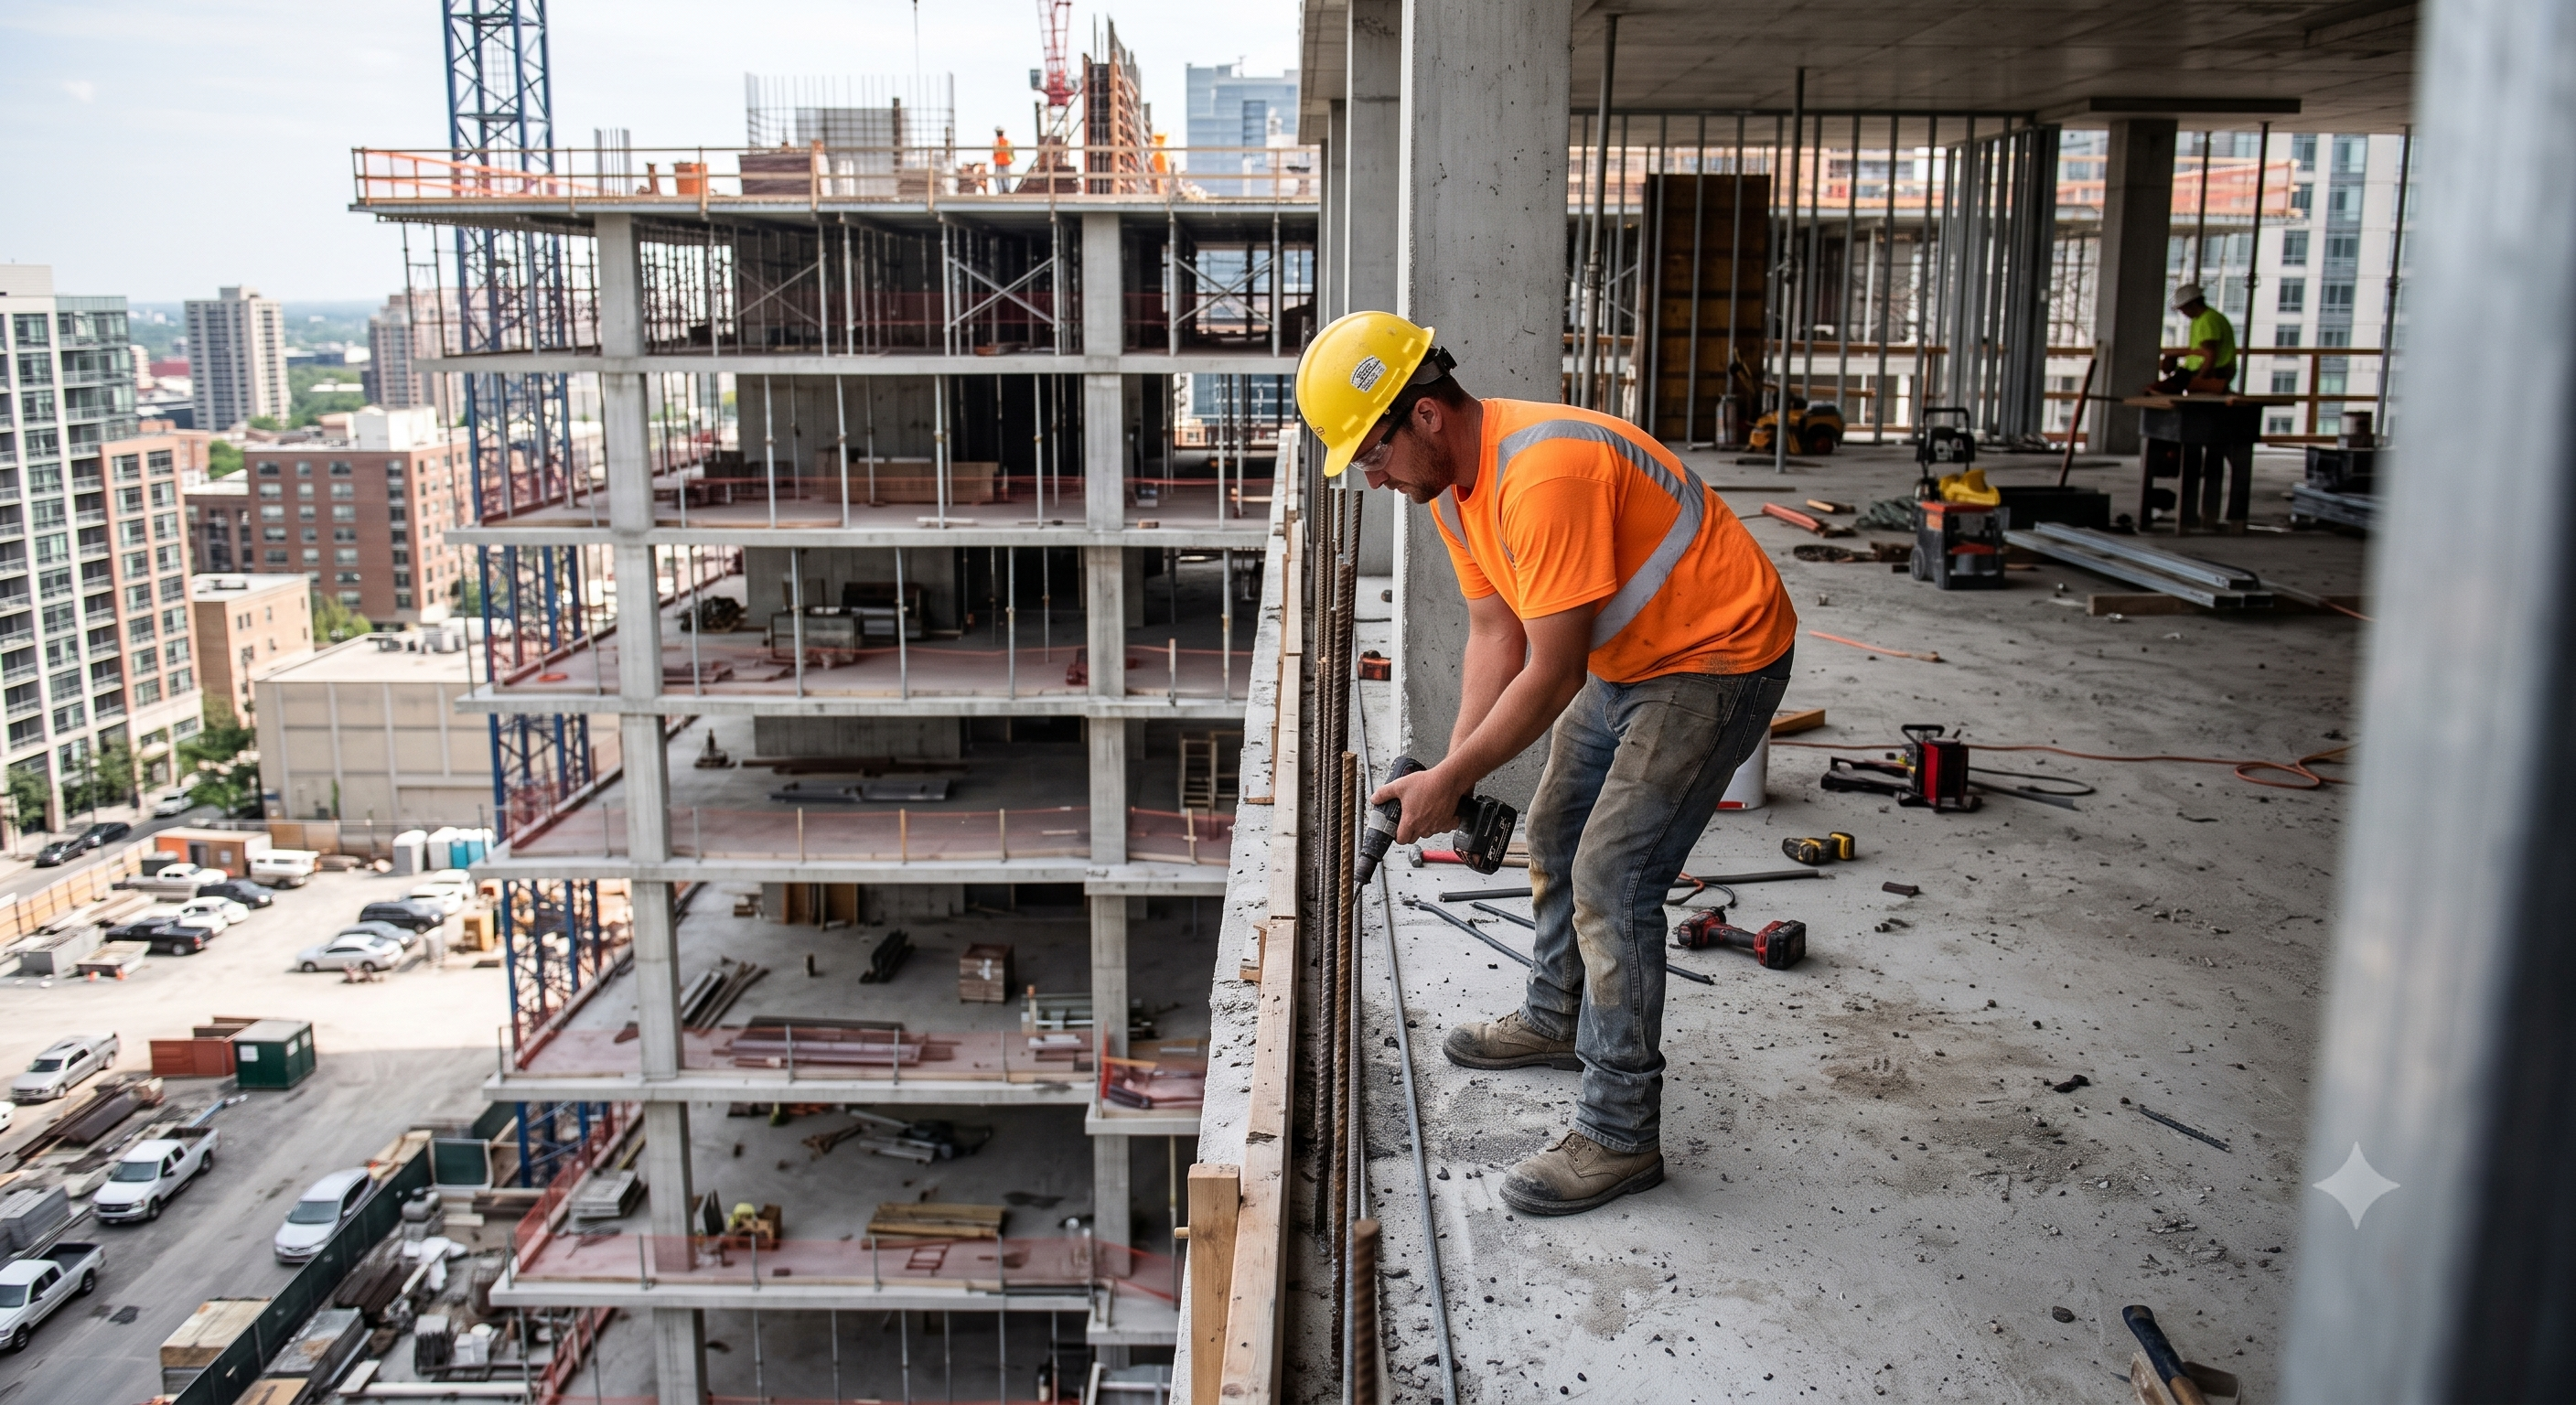
Fall Hazard Identification

Identifying fall hazards before work begins is a critical step in fall prevention. Always inspect the site for unguarded edges, floor openings, and improper equipment setups.
Preview
Preview
Preview
Canwide Steel
Module 5

Ladders

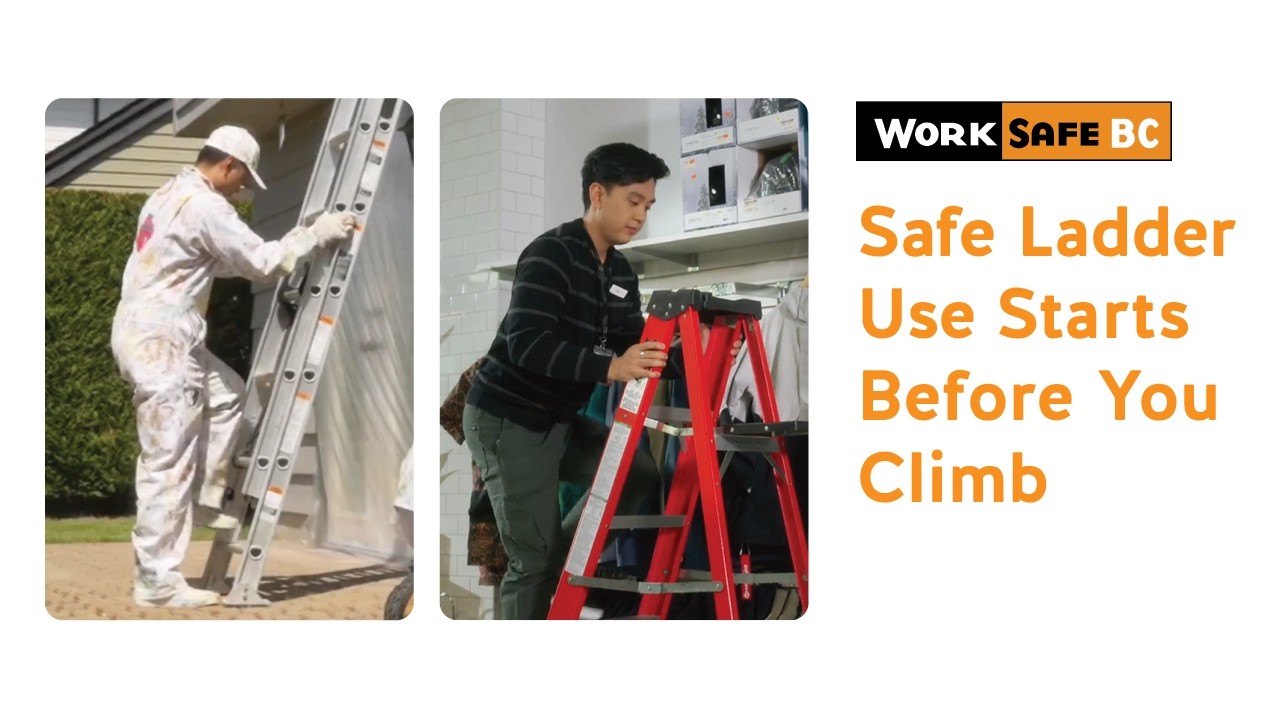
Ladders – Choose the Right Ladder and Use It Safely
Video Thumbnail

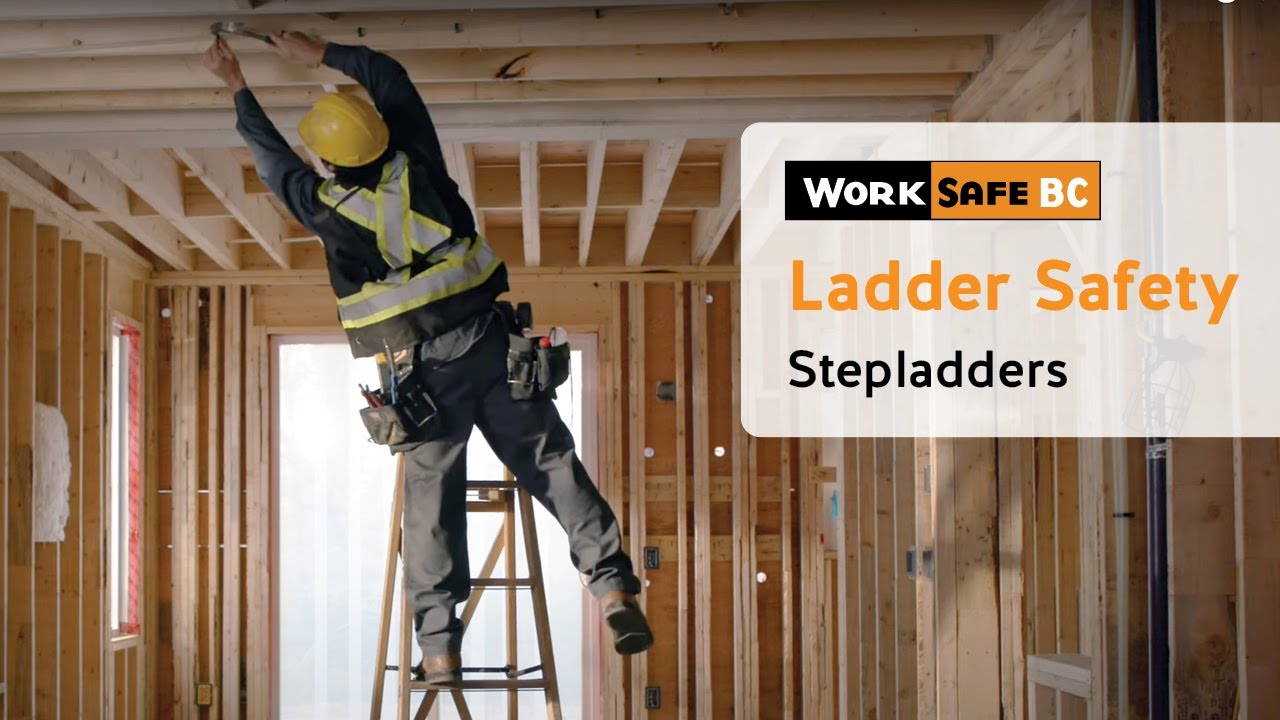
Ladder Safety: Stepladders

Video Thumbnail

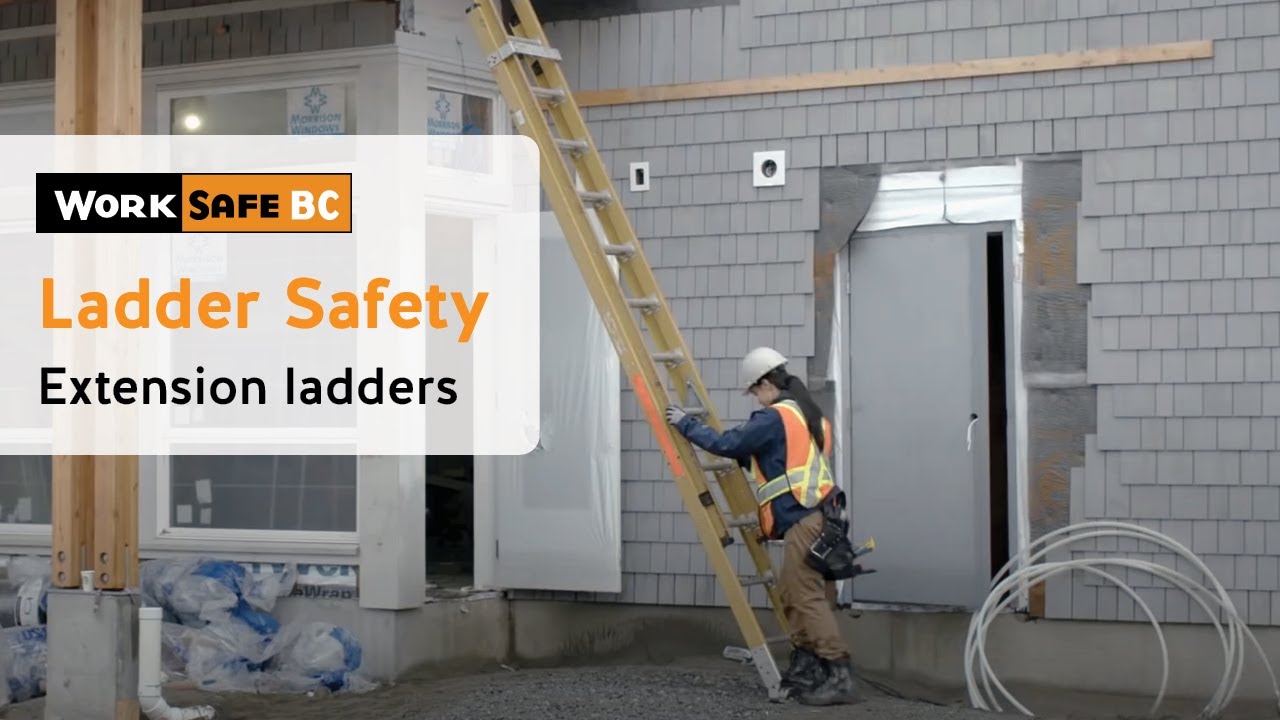
Ladder Safety: Extension Ladders

Video Thumbnail

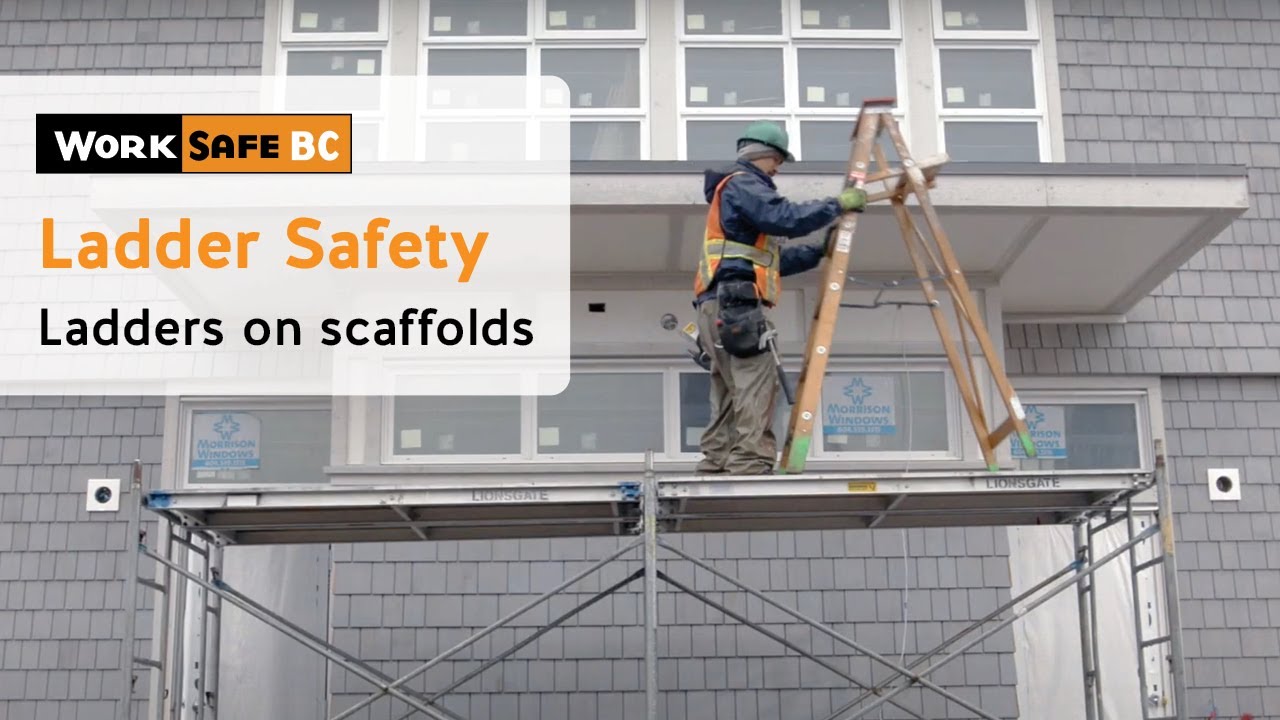
Ladder Safety: Ladders on Scaffolds

Video Thumbnail

Ladder Safety: Key Guidelines

1. Inspect Before Every Use

Check for visual defects (missing/loose rungs, cracked rails, damaged locks, grease/mud). Tag and remove defective ladders.

2. Maintain 3-Point Contact

Keep two hands and one foot, or two feet and one hand on the ladder when climbing or working (unless tied off).

3. Use the 4-to-1 Ratio Rule

For non-self-supporting ladders, place the base 1 foot away from the wall for every 4 feet of height.

4. Extend 3 Feet Above Landing

Extension ladders must extend at least 3 feet (1 meter) above the upper support point for safe handholds.

5. Proper Stability & Securement

Place on firm, level surfaces. Never use boxes for extra height. Tie off extension ladders at the top to prevent slipping.

6. "Belt Buckle" Rule

Never overreach. Keep your belt buckle (navel) between the side rails. If you must reach further, climb down and reposition.

7. Observe Restrictions

Never stand on the top cap or top two steps of a stepladder. Ensure total weight does not exceed the load limit. Use heavy-duty industrial ladders.

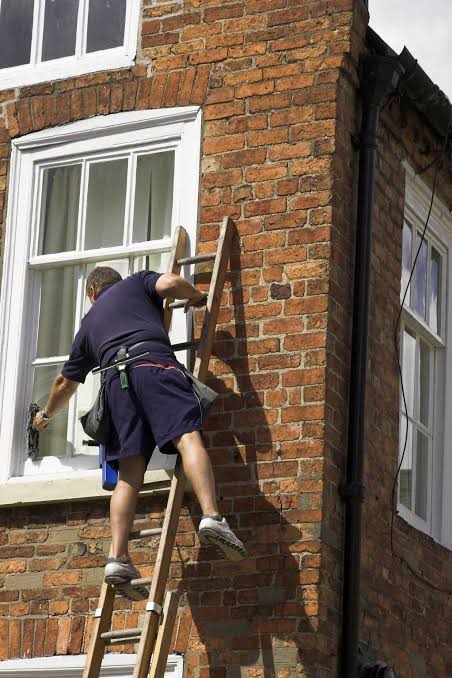
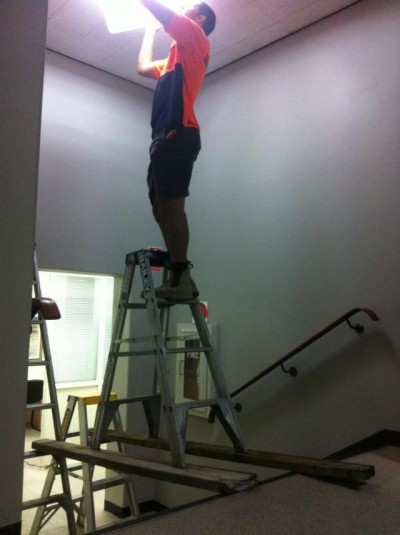
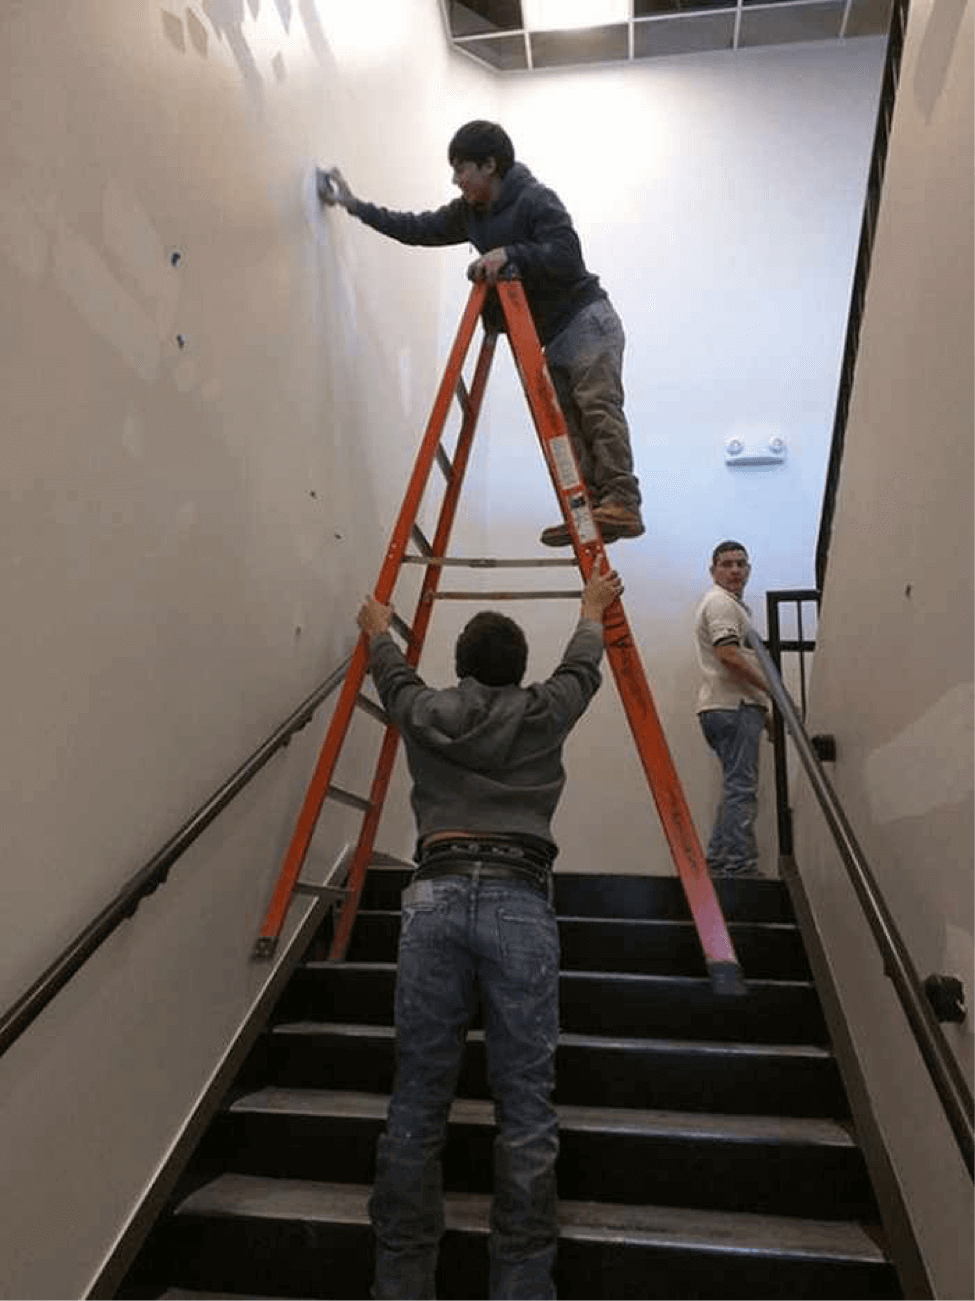
Incorrect Use of Ladders

Never compromise safety to save a few seconds. These examples show extremely dangerous setups that can lead to fatal falls.
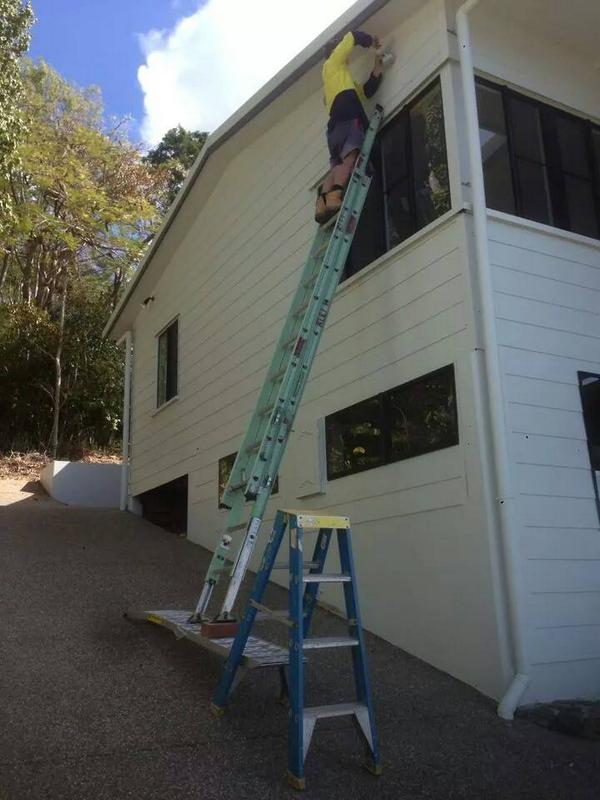
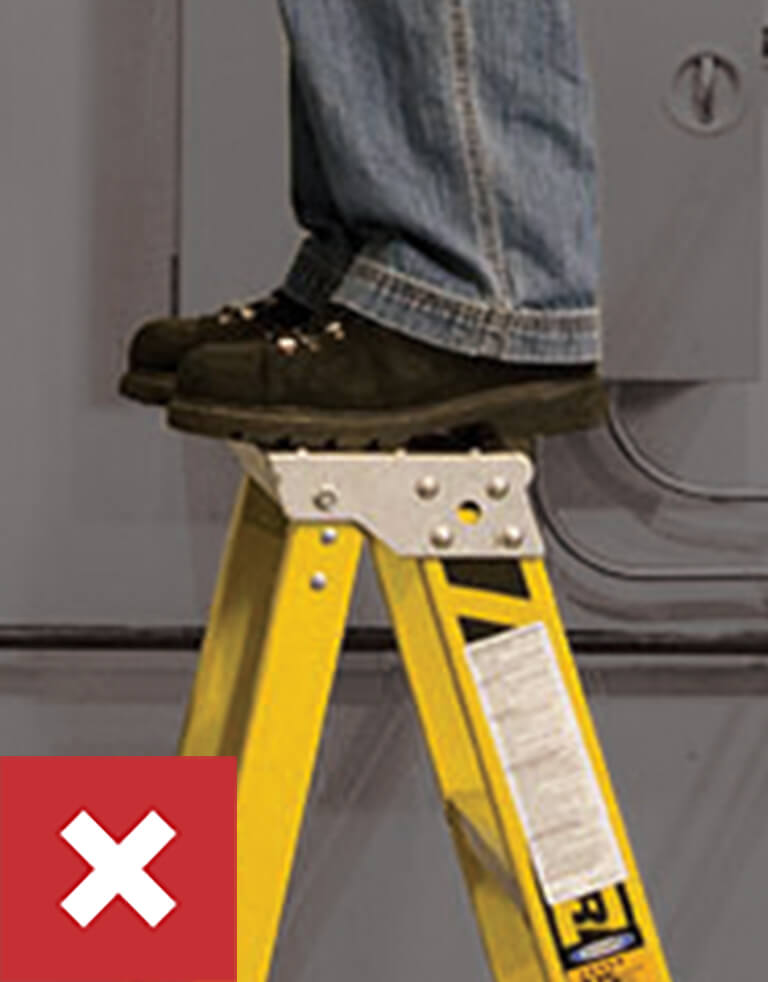
Incorrect Ladder Use
Canwide Steel
Module 6

Systems

Fall Protection Systems
Canwide Steel uses the following fall protection systems. Each has a specific application — workers must know when to use each system.

Guardrail Systems
Physical barriers at open sides and edges. Top rail at 1.07m (42"), mid-rail at mid-height, toe board at base. No harness required when guardrail is in place.
✓ When: Permanent or extended-duration work at edges, scaffolds, mezzanines
Travel Restraint System
Prevents a worker from reaching an unprotected edge. Lanyard length adjusted so worker physically cannot reach the fall hazard. Does not arrest a fall.
✓ When: Near (but not at) edges where fall arrest anchor is difficult to establish
Fall Arrest System
Stops a worker mid-fall. Includes full-body harness + shock lanyard or SRL connected to a certified anchor. Must arrest before worker hits lower level. Requires rescue plan.
✓ When: Work where fall is possible and guardrails are not feasible
Safety Nets
Installed below work area to catch falling workers. Must be engineered and certified. Inspected before each work shift. Covers large areas effectively.
✓ When: Large-area work where overhead anchor points are not available
Warning Line System
High-visibility rope/chain minimum 1.8m from edge. Only valid for low-slope roofs. Workers inside the line may work without other protection IF a safety monitor is present.
✓ When: Low-slope roof work only, per OHS Regulation requirements
Video Thumbnail
Canwide Steel
Module 7

Components

Components of Personal Fall Protection System

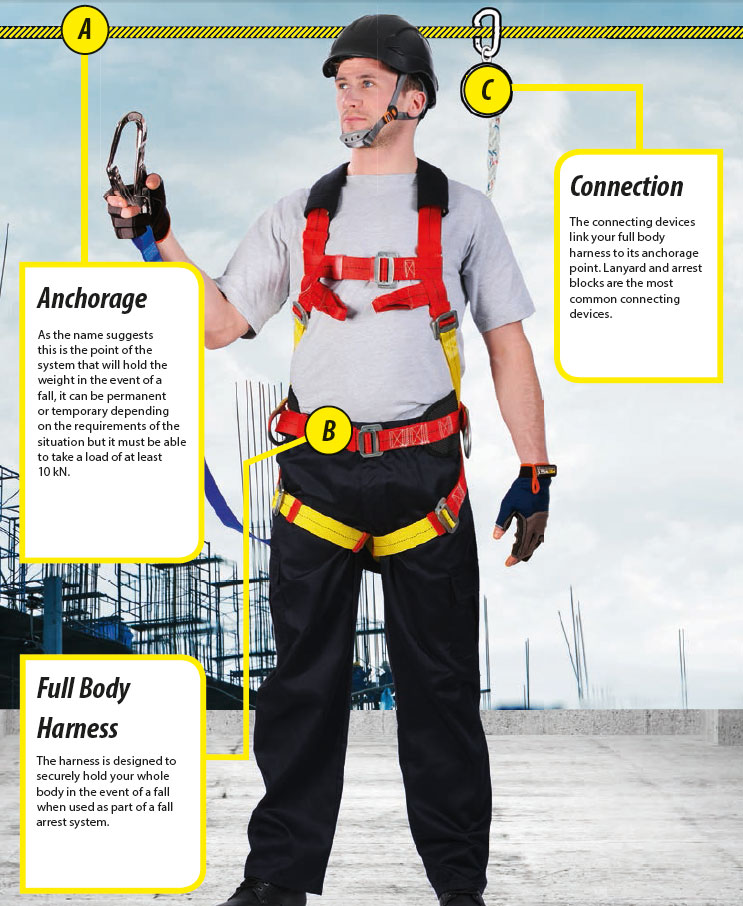
A Personal Fall Protection System consists of three main components, commonly referred to as the ABCs of fall protection:

A

Anchor

B

Body Hold Devices

C

Connecting Equipment

A. Anchor Points

BC OHS Regulation § 11.10
An anchor point used for fall arrest must be capable of withstanding a minimum force of 22 kN (4,946 lbf / 2 tonnes) in the direction of the expected load. Anchor points must be designed or certified by a professional engineer where required.

WHAT IS AN ANCHOR POINT?

Secure Connection Point
An anchor point is the fixed, load-bearing connection to the structure to which a lanyard, SRL, or rope system is attached. It is the foundation of the entire fall arrest system. If the anchor fails, the entire system fails. Every anchor must be approved before use.

MINIMUM LOAD RATING

22 kN
Minimum Strength — Fall Arrest Anchor
= 4,946 lbf  |  ~2,250 kg
Restraint anchors: 6 kN (1,350 lbf) minimum
Structural steel beams typically exceed 22 kN if properly selected

TYPES OF ANCHOR POINTS

Structural Steel Beam
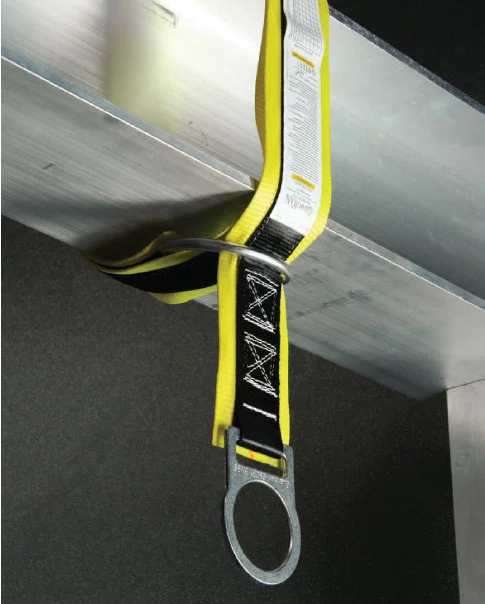
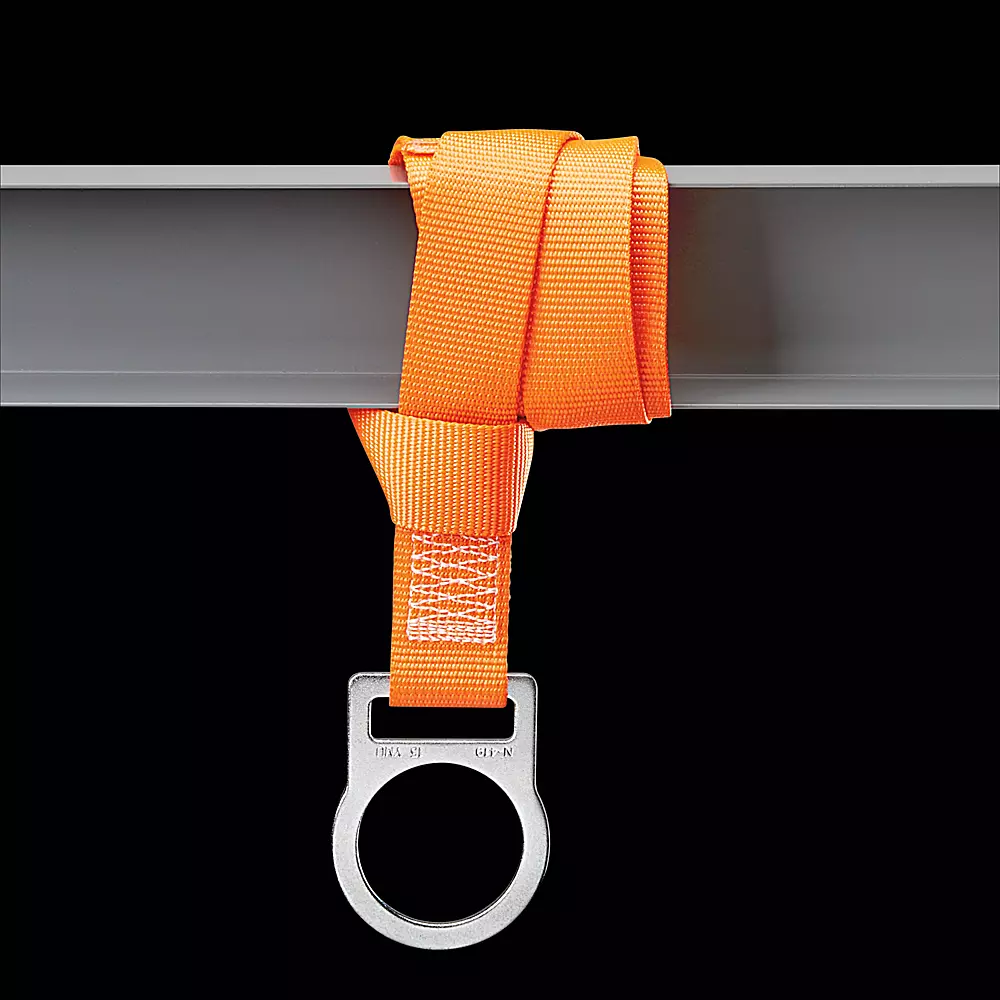
The most common anchor on Canwide Steel sites. A certified beam anchor strap or choker is looped around a structural steel member. Must be rated for 22 kN. Never anchor to light-gauge metal or unsupported deck.
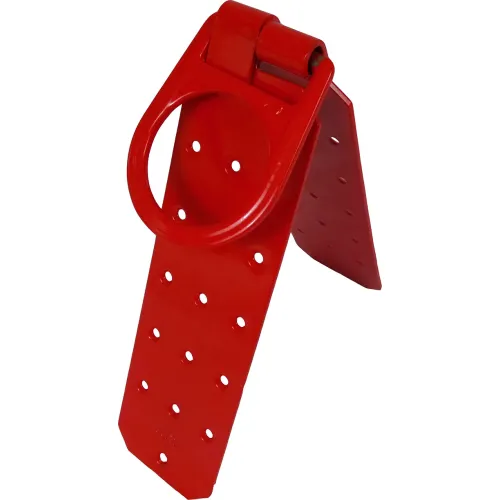
Engineered Anchor Plate / D-Ring
Permanently welded or bolted steel anchor plates with rated D-rings. Common on roof structures. Must have visible load-rating label. Inspect before each use for corrosion or weld cracks.
Horizontal Lifeline (HLL)
A tensioned cable or rope spanning two or more anchor points, allowing horizontal movement. Requires engineering design — the load on each end anchor can be 2–5x the arrest load due to geometry. Never install without a design drawing.
Portable / Temporary Anchors
Includes parapet wall anchors, roof peak anchors, and portable davit systems. Must be rated and set up per manufacturer's instructions. Inspect the substrate (wall, parapet, deck) before loading.

ANCHOR SELECTION & POSITIONING RULES

CRITICAL — Anchor Inspection Before Each Use: Visually inspect the anchor for corrosion, cracks, bent hardware, loose bolts, or damaged welds. Check that the connecting surface (beam, concrete, plate) shows no signs of deterioration. If in doubt, do not use it.

ANCHOR POINT EXAMPLES

Anchor Point
Anchor Point
Anchor Point
Anchor Point

B. Body Hold Devices

BC OHS Regulation § 11.11: A worker who may fall must wear a full-body harness connected to the fall arrest system. Body belts are prohibited for fall arrest — they are only permitted for restraint systems where a fall cannot occur.

FULL-BODY HARNESS — KEY COMPONENTS

1
Back D-Ring (Dorsal)
The PRIMARY fall arrest attachment point. Must sit centered between the shoulder blades. Connect your lanyard or SRL here — never to any other ring for fall arrest.
2
Shoulder Straps
Bear load during a fall arrest event. Must lie flat with no twists. Run from chest to back D-ring continuously. Check stitching at load-bearing points each use.
3
Chest Strap
Keeps shoulder straps positioned correctly. Must be at mid-sternum (between nipple line and collarbone). Too high risks neck injury; too low causes harness to ride up.
4
Leg Straps
Critical for preventing the worker from being ejected from the harness during arrest. Must be snug — two fingers flat underneath, no more. Twisted or loose leg straps are extremely dangerous.
5
Sub-Pelvic Straps
Some harnesses have a pass-through sub-pelvic strap. When present, it must always be connected — this strap distributes arrest forces across the pelvis and prevents slip-out.
6
Sternal / Front D-Ring (if present)
Used for positioning only or with a SRL-2 (leading edge SRL). Never use the front ring for standard fall arrest. Refer to manufacturer instructions.

DONNING THE HARNESS — CORRECT ORDER

1
Hold by Back D-Ring & Shake Out
Lift harness by the back D-ring. Shake all straps free. Confirm no twists in shoulder or leg straps.
2
Slip on Shoulder Straps
Put arms through like a vest. D-ring should fall naturally between shoulder blades.
3
Connect & Position Chest Strap
Buckle at mid-sternum. Tighten so straps are taut but chest can expand for breathing.
4
Connect Leg Straps
Reach between legs, pull each strap forward, buckle. Two-finger rule — snug but not cutting off circulation.
5
Tighten & Tuck All Straps
Eliminate all slack. Tuck excess webbing into keepers to prevent snagging on structure.
6
Buddy Check
A co-worker must verify: all buckles latched, D-ring centered, chest strap height, no twisted straps, all keepers secure.
Buddy Check is NOT Optional: On all Canwide Steel worksites, a buddy check is mandatory before any worker works at height. Catch errors before they become emergencies.

FIT & SIZING RULES

Proper Fit
The two-finger rule applies to ALL straps. Never wear a harness that is too large (slip-out risk) or too small (circulation restriction and strap damage).
Never Modify
Never tie knots in webbing, add non-approved hardware, or alter any part of the harness. Any modification voids the certification and creates an unrated, dangerous device.
CSA Certification Required
All harnesses used on BC worksites must meet CSA Z259.10 (full-body harness standard). Verify the CSA label is present and legible before each use.
Full Body Harness Diagram

C. Connecting Equipment

Connecting equipment links the worker's harness to the anchor point. Choosing the right connector type for the work task is critical — the wrong connector can allow accidental disconnection, back-loading, or insufficient fall clearance.

LANYARDS

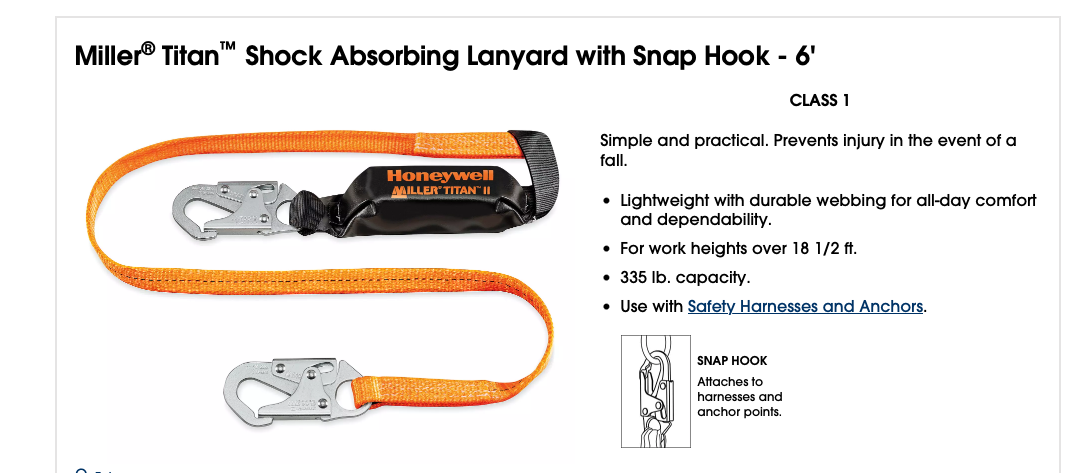
Standard Shock-Absorbing Lanyard
1.8 m (6 ft) webbing or rope lanyard with a shock-absorber pack that deploys on arrest, reducing peak arrest force to ≤6 kN (1,350 lbf). Requires ~6.0 m clearance below. Once deployed — remove from service immediately.
Y-Lanyard (Twin-Leg / Double Lanyard)
Two legs with a shared shock absorber. Allows 100% tie-off — connect the second leg before releasing the first. Required on Canwide Steel leading-edge work and structural steel erection. Never snap both legs to the same anchor.
Restraint Lanyard
A fixed-length lanyard used only for restraint — to prevent a worker from reaching a fall hazard edge. It does NOT arrest a fall. Length must be short enough so the worker cannot reach the unguarded edge at maximum extension.

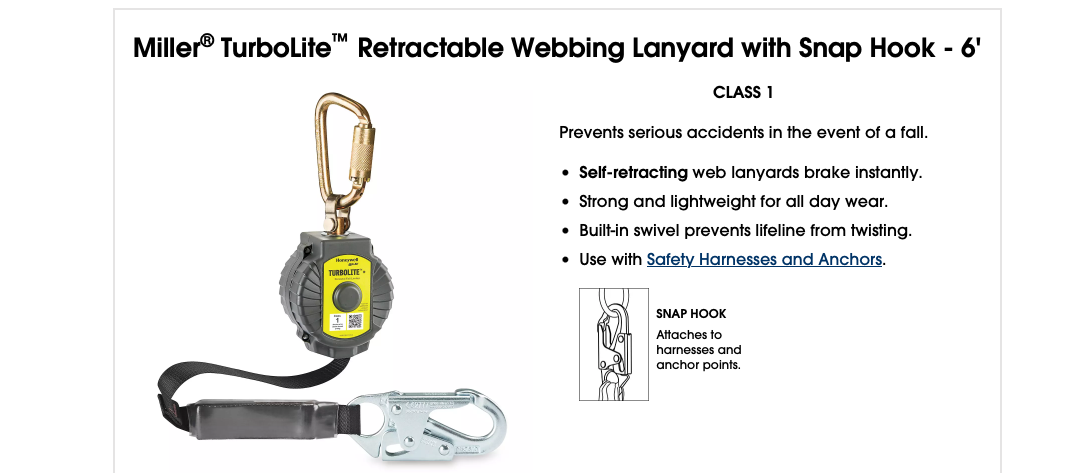
SELF-RETRACTING LIFELINES (SRL)

1
Standard SRL (Type 1)
Retracts as the worker moves, locking within millimetres of a fall. Requires much less clearance than a shock lanyard (~2–3 m depending on model). Ideal for overhead anchors on scaffolding or work platforms.
2
SRL-Leading Edge (Type 2 / SRL-LE)
Specially designed for leading-edge work where the cable may pass over or contact a structural edge. Uses a heavier cable and internal braking designed to withstand edge loading. Standard SRLs must NOT be used over leading edges.
3
SRL Inspection Points
Check housing for cracks. Pull cable fully out — look for kinks, birdcaging, broken strands, or corrosion. Confirm smooth retraction. Check the snap hook and swivel. Verify calibration date tag is current.

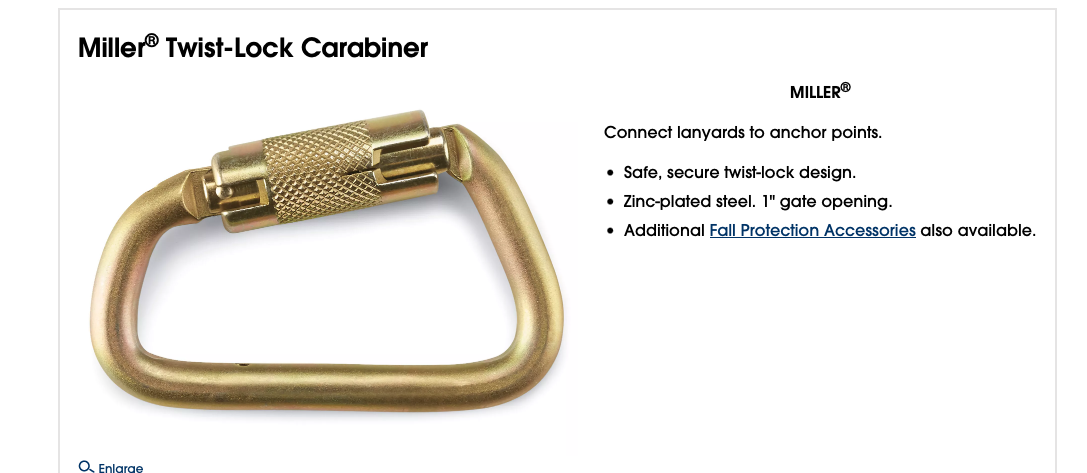
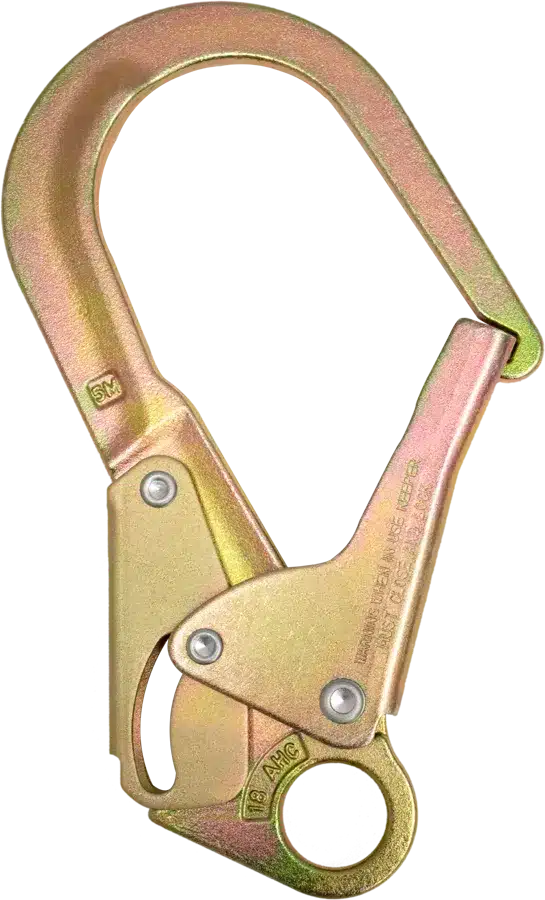
SNAP HOOKS & CARABINERS

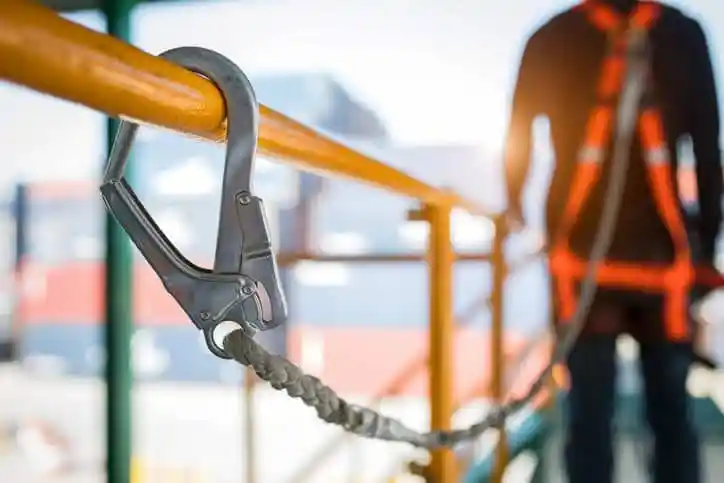
  • Double-Action Lock Required: All snap hooks on BC worksites must be self-closing AND self-locking (require two deliberate actions to open). Simple gate hooks are prohibited.
  • No Back-Loading: Snap hooks must never be loaded on the gate (back-loaded) or side-loaded. This can open the gate and cause disconnection. Use a connecting lanyard or shackle if orientation is a problem.
  • Gate Function Test: Before each use, open and close the gate to confirm it snaps shut positively and the lock engages. If the gate sticks or doesn't lock — retire the connector.
  • CSA Z259.12 Compliance: All connectors must be certified to CSA Z259.12. Check the label — it must be readable. Minimum gate strength: 6 kN. Minimum major axis load: 22 kN.
Never Connect Equipment Not Designed to Work Together: Mixing brands and models of hardware can create incompatible connections. Always use manufacturer-approved component combinations. If in doubt, consult your supervisor or the manufacturer's compatibility chart.

CONNECTING EQUIPMENT EXAMPLES

Connecting Equipment
Canwide Steel
Module 8

Inspection

Equipment Inspection

Inspect before EVERY use. Equipment must also be formally inspected and documented by a competent person at least annually. Never use equipment with missing or unreadable labels.

HARNESS INSPECTION

1
Webbing
Run entire length through fingers. Look for cuts, fraying, heat damage, chemical burns, or stiffness from contamination.
2
Stitching
Check all load-bearing stitching (especially at D-ring attachments). Cut, broken, or pulled stitches = remove from service.
3
D-Ring (Back)
Inspect for cracks, distortion, or corrosion. D-ring must move freely and return to upright position.
4
Buckles & Adjusters
All buckles must latch and unlatch correctly. Check for cracks, corrosion, or deformation.
5
Labels & Tags
Manufacturer tag, CSA rating, serial number, manufacture date, and inspection tag must all be readable.

LANYARD & CONNECTOR INSPECTION

1
Lanyard Body
Check rope/webbing for cuts, abrasion, heat damage, or chemical exposure. Inspect the full length.
2
Shock Absorber Pack
Check deployment indicator tag. If partially or fully deployed — remove from service immediately.
3
Snap Hooks / Carabiners
Gate must open and close fully. Lock must engage automatically. No cracks, corrosion, or deformation.
4
SRL Cable/Web
Check for kinks, birdcaging, corrosion, or broken strands. Housing must be undamaged. Retraction must be smooth.
Remove from Service If: Equipment has arrested a fall · Webbing is cut/frayed/burned · Hardware is cracked/corroded/deformed · Buckles don't lock · Labels are unreadable · Shock pack is deployed · Annual inspection is overdue. Tag with RED "DO NOT USE" tag and report to supervisor.
WorkSafeBC Video – Equipment Inspection
Video Thumbnail
WorkSafeBC
Equipment Inspection
This video demonstrates the critical steps for inspecting your personal fall protection equipment. You must examine the D-rings, webbing, stitching, and hardware for any signs of damage, wear, or exposure to extreme heat and chemicals before every single use.
Canwide Steel
Module 8

Proper Use

Proper Use & Donning

How to Put On a Full-Body Harness

1
Hold & Shake Out
Hold harness by the back D-ring, shake out all straps. Ensure no twists. Connect any loose hardware.
2
Slip On Shoulder Straps
Slide arms through shoulder straps. D-ring should sit between shoulder blades, centered on your back.
3
Connect Chest Strap
Buckle and position chest strap at mid-sternum level (between nipple line and collarbone). Not too high or too low.
4
Connect Leg Straps
Reach between legs, pull leg straps forward, and buckle. Each leg strap should be snug but allow two fingers flat underneath.
5
Adjust for Fit
Tighten all straps. The "two finger" rule: slide two flat fingers under any strap. Tuck excess strap into keepers.
6
Buddy Check
Have a fellow worker verify: D-ring position, all buckles locked, chest strap height, and no twisted straps.

SWING-FALL HAZARD

When anchored off to the side, a falling worker swings like a pendulum and can strike structural members at high speed. Always anchor directly above your work position. If not possible, minimize swing angle to less than 30°.

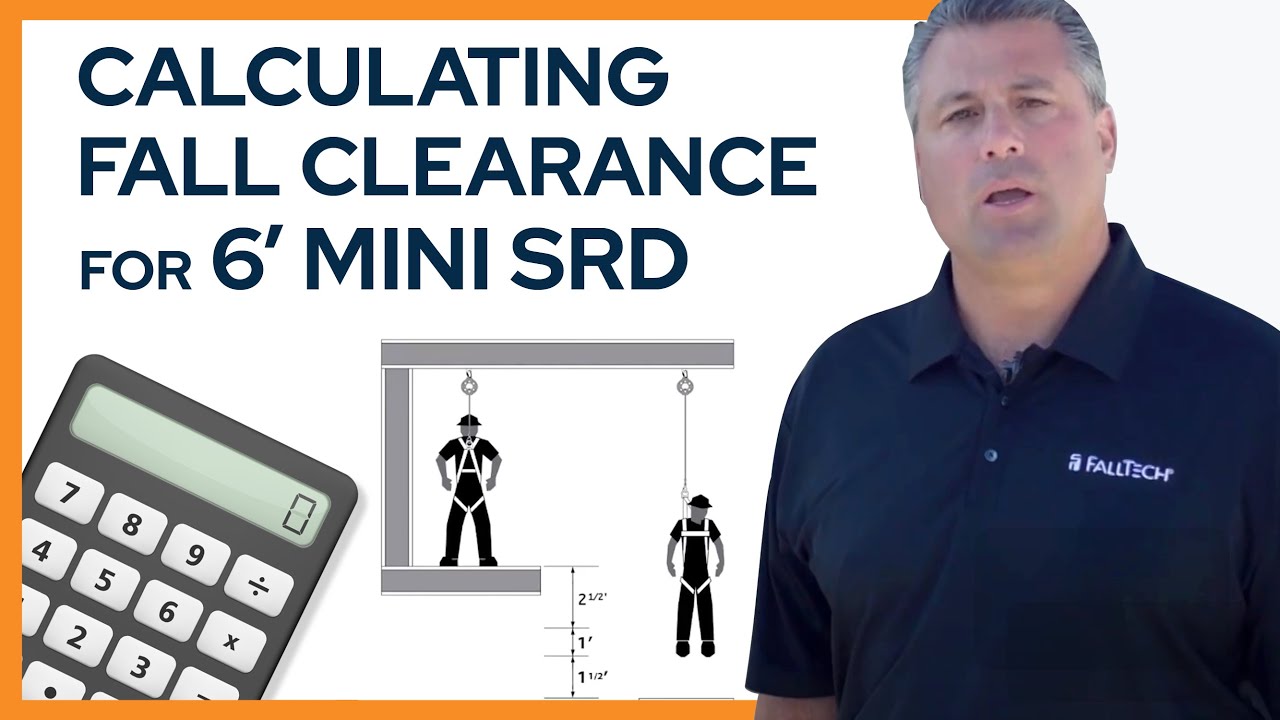
FALL CLEARANCE

6.0m
Minimum Clearance Below (Shock Lanyard)
Lanyard 1.8m + Shock deploy 1.0m + D-ring height 1.5m + Safety factor 0.9m = ~6.0m
100% Tie-Off: On Canwide Steel structural steel and leading edge work, workers must maintain continuous connection — use a double lanyard (Y-lanyard) so you are always connected to one anchor before releasing the other.
Video Thumbnail
Canwide Steel
Module 8

Fall Clearance

Total Fall Clearance Calculation

When using a personal fall arrest system, you must calculate the total fall clearance to ensure you will not strike the lower level or any obstructions during a fall.

The Calculation Includes:

  • Lanyard Length: Typically 1.8 m (6 ft)
  • Deceleration Distance: Shock absorber deployment, typically up to 1.2 m (4 ft)
  • Worker Height: D-ring to feet, typically 1.5 m (5 ft)
  • Safety Factor: Additional buffer, typically 0.6 m to 0.9 m (2-3 ft)
Total Clearance Required ≈ 5.1 m (17 ft) or more
Video Thumbnail
Training Video
Total Fall Clearance
Understanding the dynamics of a fall and how to properly calculate the required clearance distance.
Canwide Steel
Module 8

Emergency Response

Emergency & Rescue

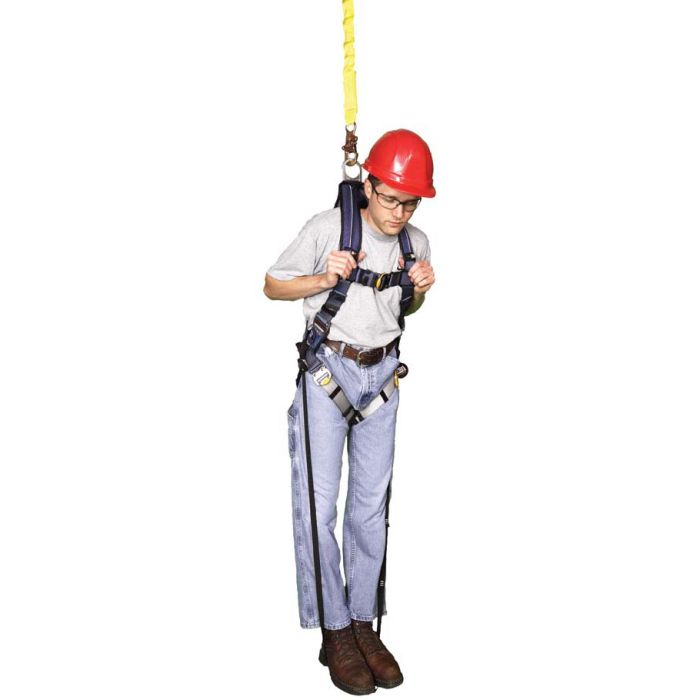
⚠️ CRITICAL: Suspension Trauma Risk
A worker suspended in a harness after a fall can suffer suspension trauma (orthostatic intolerance) within 3–5 minutes. Prompt rescue is essential — do NOT wait for 911 alone. Canwide Steel requires a site-specific rescue plan before any work at height begins.
1
Alert & Secure the Scene
Shout "STOP WORK" — stop all work in the area. Prevent others from falling. Do not try to rescue alone without proper equipment.
2
Call for Help
Immediately call your supervisor AND activate your site rescue plan. Also call 911 if required. Give location, number of workers affected, and nature of incident.
3
Execute the Rescue Plan
Trained rescue workers retrieve the fallen worker using site-specific rescue equipment (aerial lift, ladders, rope rescue). Goal: retrieval within 3–5 minutes.
4
Treat Suspension Trauma
Do NOT lay worker flat immediately — have them pump their legs during rescue. Lay semi-reclined. Seek immediate medical attention even if they feel fine.
5
Preserve Scene & Report
Do not disturb equipment or the fall area. Take photos. Report incident to WorkSafeBC within required timeframe. Remove all involved equipment from service.
After Any Fall: The harness MUST be removed from service — even if the worker was not injured. Equipment subjected to fall forces must be inspected by the manufacturer before returning to use.
Canwide Steel Rescue Plan: Site supervisor holds the rescue procedure. Know the muster point, rescue equipment location, and who the trained rescue workers are before starting any elevated work.

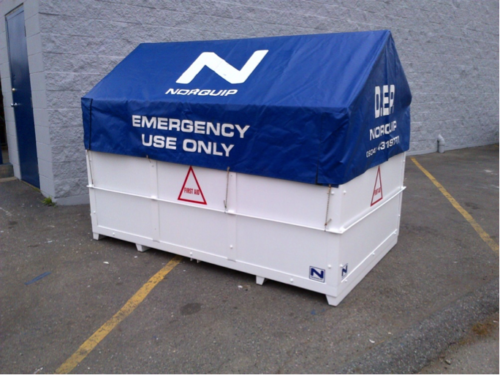
Dedicated Evacuation Platform (DEP BOX)

The Dedicated Evacuation Platform (DEP Box) is used to safely lower a suspended worker to the ground or another lower level after a fall.

Key procedures for use include ensuring clear paths for descent and inspecting the equipment before deployment. Only trained personnel should operate rescue equipment.

DEP BOX

Trauma Straps

Trauma straps (suspension trauma relief straps) allow a suspended worker to stand up in their harness, relieving pressure on the leg arteries and preventing suspension trauma.

They should be deployed immediately after a fall arrest while awaiting rescue. Standing in the straps promotes blood circulation and buys critical time for emergency responders.

Trauma Straps
Canwide Steel
Module 8

Practical Training

Practical Training

Instructor: Each worker must demonstrate all skills below. Complete the Practical Evaluation Checklist on the Documentation slide (Slide 11) for each worker. Provide hands-on coaching as needed.
Canwide Steel
Module 8

Knowledge Check

Knowledge Check

Answer all 10 questions. You need 80% or higher (8/10) to pass and proceed to your certificate.

Question 1 of 10
When is fall protection required on a Canwide Steel worksite?
a) Only when working on roofs
b) At 3 metres (10 feet) or more above a lower level, or near hazardous conditions at any height
c) Only when the supervisor says so
d) Only on jobs lasting more than one day
Question 2 of 10
Before using a harness, what should you inspect?
a) Only the D-ring and buckles
b) Nothing — equipment is checked monthly by safety
c) All webbing, stitching, buckles, D-rings, labels, and connected lanyards/SRLs — before every use
d) Check only when it looks visibly damaged
Question 3 of 10
Can you tie off to any structure on site (e.g., a scaffold pipe, rebar, or HVAC unit)?
a) Yes, as long as it looks solid
b) No — only certified anchor points rated to at least 22.2 kN (5,000 lbs) per worker are permitted
c) Yes, if approved by a co-worker
d) Only scaffold pipes are acceptable anchors
Question 4 of 10
A harness was used in a fall arrest — the worker landed safely. What should you do with the harness?
a) Inspect it and put it back in service if it looks okay
b) Give it to another worker
c) Remove it from service immediately — tag "DO NOT USE" and report. All fall-arrested equipment must be returned to the manufacturer for inspection.
d) Only remove it if the webbing is visibly damaged
Question 5 of 10
You find a harness with a label that is unreadable. What do you do?
a) Use it — it's probably fine
b) Write the information on the harness in marker
c) Ask a co-worker if it's safe
d) Remove it from service immediately — unreadable labels mean the equipment cannot be verified and must not be used
Question 6 of 10
What does the "A" in the ABCs of fall protection stand for?
a) Alignment
b) Anchor Point
c) Arrest
d) Action
Question 7 of 10
When climbing a ladder, how many points of contact must you maintain?
a) 1-Point Contact
b) 3-Point Contact
c) 2-Point Contact
d) 4-Point Contact
Question 8 of 10
Where should your belt buckle be when using a ladder to prevent tipping?
a) Outside the side rails
b) Between the side rails
c) Touching the rungs
d) It doesn't matter
Question 9 of 10
What is the primary purpose of a guardrail system?
a) To hold your tools while working
b) To form a barrier and prevent a fall from occurring
c) To catch you after you fall off the edge
d) To mark the edge of the property
Question 10 of 10
If you do not fully understand a safety procedure, what should you do?
a) Ignore it and continue
b) Guess the best way to do it
c) Stop and ask your supervisor for clarification
d) Skip that specific task entirely

Answer all 5 questions to submit

Canwide Steel
Module 8

Training Records

Training Records

Attendance & Training Record
Practical Evaluation Checklist
TaskRatingNotes
1. Pre-use equipment inspection
2. Don and adjust full-body harness
3. Connect to certified anchor point
4. Safe movement / 100% tie-off technique
5. Identify and reject unsafe equipment
🎉

Training Complete!

Fill in the worker details below and print the completion certificate. Keep a signed copy on file.

Canwide Steel
Certificate of Completion
Fall Protection Training
Canwide Steel Ltd. · BC OHS Regulation Part 11
This certifies that
_______________________________
Employee Name
has successfully completed the Canwide Steel Fall Protection Training Program,
covering fall hazards, protection systems, equipment inspection, proper use,
emergency procedures, and practical evaluation in accordance with
BC OHS Regulation Part 11 – Fall Protection.
Date Issued
____________
Expiry Date
____________
Employee ID
____________
Worker Signature
Trainer / Supervisor Signature
CANWIDE STEEL LTD. · canwidesteel.ca · Form #FP-CERT-01 Rev. 01
Renewal recommended every 3 years or after significant regulatory changes.
Fill In Certificate Details